
 The base of the card is cardstock (SU old olive) and the decorative border is double sided paper from KaiserScrapbook, made in Australia. I found it at my local craft store. I punched the border with a corner punch with the guard removed. Underneath the patterned paper is a small piece of vanilla cardstock punched the same way. I felt that the vanilla color made the pattern paper "pop" off the green. The words holiday recipes was stamped using my Stamp-a-majig and individual letters. I searched my stamp stash first for words and didn't like my options. The bow is like a velvety feeling cord. You can see from the side view below that I have eyelets set in the cardstock with the cord pulled through. They are little holly leaf eyelets.
 My portfolio was made with Christmas baking in mind. I don't know about you but I love the holidays and all the baking I get to do! :) So each category stands for something you'd bake for Christmas; cookies, cakes, breads, pies, bars & squares, and breakfast & brunch. There are 6 pockets and each pocket holds 5 recipe cards. I struggled with ideas for making the cards. I tried different stamps I have and didn't like any of the options...
 So instead of going and buying more stamps, which I could have done, (hahaha) I chose to use my computer. I used the Gigi font and just made a text box with a dotted border and then typed in what I wanted on the card. I printed several pages before I got the size right. Then I made a dotted circle for the titles. They are 1" in diameter and then I used my various sized circle punches for the layers.
 The pockets are decorative paper matching the one I used on the cover. The strip across the top is paper, not ribbon.
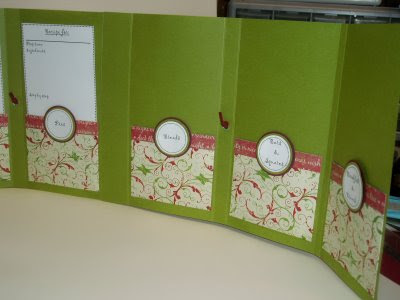
Here's what the pockets look like with no cards in them. (picture above) And in the picture below, you see what it looks like partially folded.
And below you see it completely unfolded. I really liked this project. Fun to make and like Lauren said they would make great gifts! Thanks for looking!! What do you think?? 
I looooooove it!!!!!!
ReplyDeleteDo you have the measurements you used??? Would you mind terribly sharing them with me...??? If so, you can PM or Email me. Thanks!
ReplyDeleteit looks great! I have been craving those instructions from Lauren also! I hope you might be willing to post a tut or some measurements, as you have done a wonderful job as well! I love the way it turned out!
ReplyDelete