Monday, February 25, 2008

Stamp Storage

Do you have hundreds of non-SU stamps and have a difficult time storing them all? They take up a ton of space! Well here is what I do with my stamps....I purchased plastic paper keepers from my scrapbook store (when we had one). I believe they hold at least 100 pages. I got large pieces of foam core board from Michaels or an art supply store, and cut them to 12x12. I slid them in to the plastic sleeve and then I grouped my stamps into categories; like Valentine's Day or Christmas, or Birthday, etc. I can slide the mat board in and out of the sleeve with my stamps on it and they don't move around or fall to the bottom of the sleeve. As you can see, you can store a lot of sleeves on one shelf. Here I just have plastic milk crates that I purchased from Staples and stacked them on their side to make shelves. Eight sleeves fit nicely and they are all catergorized! Yay! I also have frequently used stamps like sentiments in these drawers.....I got them inexpensively at Walmart. I actually have 4 of them filled with differen't things; stamps, Cuttlebug folders and dies, templates, embossing powders, scrap paper, and anything else I can fit in them! This shelf I keep on my desk so it's easy to reach. The others I have placed around the room on other desks.
How do you store your stamps?

Star Book for Demo

Here is the star book I promised yesterday! They aren't that hard to assemble; just hard to fill all the pages. And when I can't use SU products, or creative memory products (for cutting holes), my Cuttlebug, Cricut, and SU ink, it makes it rather difficult to come up with alternatives! I basically can't use any supplies that this particular doesn't carry. She carries the Wizard and of course I have every other cutting tool except that one! LOL. I used my Marvy scallop punches to make the windows. I used colored pencils with baby oil to do all the coloring. I used background stamps to stamp all the inner and outer pages. I also used my clear glitter pen to outline the flowers and other key elements. The "Happy Spring" stamp is actually a long stamp that I separated into sections. The stamp is from Great Impressions and sold here at Addicted to Rubber Stamps. When I inked up my stamp, I covered with a post-it note the area I DIDN'T want. I also used my Stamp-a-majig for perfect placement. (I forgot to mention that was also a recent purchase! :D) The butterfly in the window is from the new Lizzie Anne set I mentioned i the previous post. This background stamp on the "hello" page is from Hanko Designs and is sold here. I love this stamp because it's beautiful when you use markers to color the stamp and then "huff" on it before you stamp it. You can get some amazing variation doing it that way. For this project however, I used Marvy Matchables Dye Ink pads. The bird stamp is from Inkadinkado and can be seen here. And here is my completed Star Book! What do you think? Feel free to leave comments or questions! Thanks for stopping by!

Sunday, February 24, 2008

Demo Day was yesterday

Yesterday was my first demo day that I participated in. It's very different for me to have a dozen women just staring at me, and not partaking in the project! For one hour, I showed them how to decorate and put together a star book. It was at a local stamp store so I couldn't use any SU stamps or ink. I hope to post pictures of it later today. Oh and I have pictures of cute little key chain post it's that I learned to make using this tutorial. They are really cute and easy to make.

I have an update on the Fiskars Finger Craft Cutter.....if you haven't purchased one already, you must get one! It's just like holding a pen. I am actually able to cut straight lines without using a ruler or straight edge! It's wonderful for cutting around curves too! I just love it! It's a handy little tool and very inexpensive!

I've purchased quite a bit of stuff over the last few weeks.....A Lizzie Anne Little Bits Cling Stamp Set called Blissful Blossoms. I love her these sets! They stick to the acrylic block without using double stick tape!
I got a ton of colored pencils to do the gamsol technique too! Instead of gamsol however, I am using baby oil. I can't find gamsol and I can get the baby oil at the corner gas station! Perfect! LOL. It's a beautiful technique, you have to try it! I used that techique on my star book so you'll be able to see it when I post the pics.
I also got some of the ginormous scallop punches. I had posted a while back how I store them and I love it! Here's the link in case you didn't get to see it. I have added two or three more punches to my collection! :)
I got some super cute Easter stamps from Inkadinkado and also some St. Patty's Day stamps.
Right now, that's all I can remember but I have a feeling I have forgotten something! Today I purchased some index cards that I am going to use to catalog my stamps and inkpads. I find myself re-purchasing the same ink!! It's very annoying! LOL So when I finish that I will post that.
I am also working on getting some video tutorials on my blog; have to work out some kinks first though! LOL So I'll keep you posted on that.
So that's about it. Hope you have a wonderful weekend! Thanks for stopping by!

Sunday, February 17, 2008

Bouncing Brayer and Brayered Sky

Wanted to try the Bouncing Brayer Technique found here. I also combined it with post it notes so I could create a little landscape at the bottom and around the trees. I used my Kaleidascope pad (bouquet) to create the background on white cardstock. I then stamped the birds with Stazon Black and then stamped the trees with dark green chalk ink. I then did the landscaping with post it notes. I trimmed the card before I did the landscaping at the bottom of the card. Then I mounted it to black cardstock and finally to the blue card.
This one I used individual colors and did the Brayered Sky Technique found here. I used Ruby Red, Cameo Coral and So Saffron to create the background and then stamped the flower and sentiment, both by Kodomo Inc. Then I mounted it to black cardstock and finally the red card. I love both of these techniques!! What do you think? Comments are appreciated! :)

Tuesday, February 12, 2008

Wedding Cake Card

This is what I made this morning! I love it! It was time consuming but I love the end result! I don't know anyone getting married but that's ok! LOL Below you will find detailed photos and instructions.The first thing you want to do is get your Going Grey cardstock and vellum. Cut your cardstock to 11x5 1/4, and score it at 5 1/2, so that your completed card will be 5 1/4 x 5 1/2. Save the left over grey cardstock. Cut your vellum in three pieces; 1 1/4 x 1 1/2, 1 3/4 x 2, and 1 3/4 x 2 1/2. I then put the vellum pieces through my cuttlebug embossing plate. Note: The vellum may crack around the edges of the raised spots; it's okay....mine did the same thing.Next, adhere the vellum pieces to the scrap piece of grey cardstock. Use SU white craft ink and dab your finger on it and lightly tap your finger across the raised areas of the vellum. This will make them more prominent. Sorry about the different in color between the two pictures. Cut the vellem pieces out. Do not leave a grey border around them.Next, get out your versamark pad and silver embossing powder. Scrape one side, either left or right, of the cake piece on the pad. Do not scrap the top and bottom edges of the cake piece. You just want a tiny bit of ink on the edge.

Now lightly tap the inked edge in the embossing powder and heat set. Do one side at a time.
And do all three cake pieces.

Next, cut a piece of white cardstock to 5 x 5 1/2 inches. On the 5 1/2 inch side, tear a little strip off going all the way across, so that the piece ends up being 5 x 5 1/4 inches. Next you're going to adhere your cake pieces to the white cardstock. I adhered my cake pieces slightly off center so that I could stamp on the left side. NOTE: I did not adhere the white cardstock to the grey piece at this time! I just placed it there for the photo.
Now you are going to get your prima flowers and silver brads out! I did a bunch ahead of time so that I knew I had enough to cover the bottom and middle sections. Start in the middle on the bottom cake piece and work your way to the edges. Leave the torn edge showing at the bottom. I adhered them with Diamond Glaze, one at a time.I had to poke my flowers with my piercing tool to make sure the center was large enough to put the brad through.

I used reverse grip tweezers to grip the brad and poke it in the center. Work your way across each section, overlapping slightly so that there are no spaces between the primas.When you get to the top tier, again start in the middle but also place it low enough to allow the white cardstock to show above the flower.After 5 hours, this is what it looks like! Just kidding! LOL. Next gather your embossing supplies and the stamp of your choice. I used the word love from the Wonderful Words set. Turn the stamp upside down and pat the Versa Color ink pad on the rubber. This allows you to see where you're putting the ink and also prevents you from putting ink around the edges where you dont' want it!Next, pour the powder on the word. I used a little spoon for this to have more control. Tap off the excess on a scrap piece of paper so you can put the unused portion back into the container. Now heat set it. The Versa Color makes a crisper image and it's much more detailed.By this time, everthing is dry and you can adhere it to the grey cardstock. This is what it will look like! I love it! I hope you try one too! Tell what you think and if my instructions were clear enough. If you have any questions please let me know! Thanks for stopping by!


Sunday, February 10, 2008

Waterfall Card and Tunnel Card

Yesterday I managed to make my tunnel card in record time! It took me about 2 hours! I don't think that's very fast for many of you though! The day before yesterday, I made a waterfall card, which I had never done before, but my camera was dead so I had to charge the battery......here is my tunnel card...I used patterned paper by Magenta and the colored cardstock came from my local stamp store. The yellow cardstock inside is just plain but the darker green cardstock has a shimmer to it; very nice color!


I used the tunnel instructions found here which were very easy to follow. I first cut out all my paper and cardstock and since I had patterned paper, I didn't have to stamp a background for the inside of the card. I did the inside first so I will talk about that first. After I cut everything, I scored all the pieces. Then I cut the ovals out using my Creative Memories templates and cutters. They are the best! Then I adhered the front pieces together. (the green and the patterned paper)

Then I stamped the sentiment on the yellow piece with VersaColor black and then embossed it with Stampendous Vertigre Opaque Embossing Powder. (The stamp is also from Stampendous). VersaColors gives it a more crisp image. Once that was done, I attached it to the back of the front piece.

I then moved on to the dangling piece you see above. I punched out a yellow piece with my Ek Success Whale of a punch 1 1/4" circle. I put VersaMark over the entire piece and embossed it with the same embossing powder I mentioned above. LET THIS DRY VERY WELL BEFORE YOU TOUCH IT! I learned the hard way, and scratched it and had to re-emboss the same piece. I couldn't see the scratch anymore, so that was nice! Then I punched a flower in plain green cardstock using my Marvy Uchida Flower Punch. It punches out the petals and center and leaves behind the negative space. I then punched the flower out with my 1 1/8" circle punch. You can see the embossing through the flower petals. I then attached a bronze brad in the center. Then I punched out another yellow circle the same size and did the same thing so that my dangly piece would be two-sided. In the middle is sandwiched some clear thread from my daughter's sewing kit! Below you can see a close up of the dangling flower.

Now I will move on to the front of the card...... I knew I wanted the same flower punched out on the front, so I did that in the lower right hand corner and filled the petals in with diamond glaze. I love how shiny it turned out!


Above that, I layered cardstock and stamped friends with VersaColor black and embossed with the same powder.
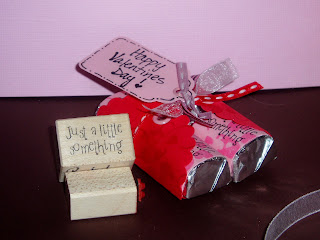
Very easy to make and I loved how it turned out. What do you think?


Here is my waterfall card....

I used all the same paper and embossing powder for this one......I was quite intimidated for a long time and never wanted to try a waterfall card. Here are the instructions that I used. Let me tell you that it is a lot easier and faster than I thought! I actually thought this was easier than the tunnel card. Here is a close-up of the stamped image which I embossed. The stamp is a four-sided block from Impression Obsession. If you do any tea bag folding, this is what the stamp is used for; to make the squares for tea bag folding. Each of the squares is stamped on white cardstock and then mounted to yellow cardstock. I edged both of them with chalk ink before adhering them together.


You gotta try one of these cards if you haven't already. I think you will find that they both are quite easy. Thanks for stopping by! Don't forget to leave a comment if you have the chance!

Having some fun with my dogs!

Ok, today on SCS I was chatting with "KittyKat" and I noticed her new avatar. I commented that it was so cute and asked if it had a bowl on it's head.....she said that it was a knitted hat.....(I thought this was HER cat...) She emailed me this picture.... Ok clearly, that is not a hat!
So I looked at it and said, "there's no way that's a hat.....that's a bowl!! It looks just like one of my Japanese rice bowls!...." So I took a picture of it! Upside down, just like the one on the cat!.........and below, you will see it on two of my dogs! LOL


Just had to have some fun! LOL

Friday, February 8, 2008

Cleaning my craft room...

Hi everybody! Happy Friday! We have over a foot of snow on the ground again! YAY! It's just beautiful outside. No sense taking pictures though because they all look the same! Same house; same white! LOL.
I've been re-arranging again in my craft room! :) It's so fun to come up with new ways to do things. Now I have two working stations, well 4, but my younger daughter uses one whole table and my older daughter uses the other table for sewing. I made my compter area a work station as well so now I can browse the gallery or chat while I create! :) I don't have to go back and forth anymore!
Katie is getting a ride home from her boyfriend today; for the first time! Ahhh! I hope they take the back roads and not the highway! He's a good kid and has a lot of driving experience from having his permit but now he's got his license and doesn't have to drive with an adult anymore! I'm kinda freakin' out! LOL Will let you know how that goes....
Made a waterfall card today as a sample for a class this month. It's the first one I've ever made and I am happy with the results; will have to make this sort of card more often! I just tried to take a picture of it but my camera battery is dead so I have to charge it and I will post a picture later today.
Thanks for stopping by and stayed tuned....

Wednesday, February 6, 2008

Class Schedule

For those of you who live in Vermont, I have added a calendar with my scheduled classes listed. Under my profile you'll see the box to click on. I teach at Stamp On It in Essex and I have 5 classes this month including a Demo Day! If you have a chance take a looksie!

Thanks for stopping by!

Nugget Wrap

It's been a snowy day here finally! We haven't had much snow this winter! It started snowing this morning around 7 am and by 10 am, we had more than 4 inches! :D I was so happy when I woke up and saw the white trees! So I turn on the tv and watch the news for school closings....a few schools in upstate NY were closed and one school in NH was closed. Nothing in VT was closed. So I get the two little ones up and ready (Katie got to go in later) and I put the other two on the bus. At 8:30 Jared leaves to take Katie to school which is about 20 miles maybe. An hour later, they call from the highway......they had only traveled 10 miles! They had just passed an exit so they had to keep going until they saw a turn-around thing in the median, which is illegal to use! LOL. He said he was going like 1/2 a mile an hour. He said it reminded him of when we lived in San Diego! LOL. So they turn around and head home. It took them an hour an a half for a 20 mile trip. Usually 40 miles takes about 45 minutes or so.
Later, today after the kids came home from school, they told me during dinner that their bus had gone off the road!! No phone calls home to the parents obviously and they were late to school. They couldn't pick up a child because they couldn't get down his street! I think they should have had a snow day!! What do you think? Isn't that nuts? Tomorrow if it's still snowing, which it is, we are keeping the kids home! No sense in risking their lives two days in a row!!! It's supposed to snow all night into tomorrow afternoon! So we'll see what happens tomorrow!
On to brighter things....here are current pics! Yay! I loved this project. You can find a wonderful tutorial here. Nichole does great tutorials! This was so fast and easy to make! I will have to make more for other holidays!
For this one, I used my Marvy Mega Punch....the pink scallop circle. I punched out two circles, stamped them with Stazon Blazing Red ink, folded them in half with the stamped side facing out, and set them aside. I then cut a retangular piece of paper, in a lighter shade cut to 2"x2 3/8", and set that aside. I attached the circles to the bottom of the rectangular piece by putting one half of the circle underneath and the other half on top of the retangular piece, making sure to butt the creases of the fold up against the side of the rectangular piece. I then set two large eyelets to accomodate the ribbon.I then stamped out my background design on the nugget wraps (swirly hearts from Inkadinkado). Then I stamped the sentiment in the center of each background. Then I cut them out to fit around the candy. I attached them with glue dots and then also attached them to the wrap with glue dots. After tying a knot with the red ribbon, I added several other ribbons and also stamped the tag. The punch I used is shown here. I set an eyelet in the tag so the ribbon wouldn't rip out and tied it on with its own ribbon. Viola! All done! They are wicked easy and wicked fast! Love 'em!

Monday, February 4, 2008

I saw this Hershey bar (link below) and thought it was beautiful! I hadn't tried the dahlia fold yet and thought this would be the perfect start! I didn't have to fold as many circles! LOL
http://www.splitcoaststampers.com/ga...7926?si=dahlia
I made several changes when I made this so that I wasn't completely copying! :) I stamped everything! I used circle stamps called Box of Dots from Hero Arts and stamped the wrapper using the rock and roll technique with pinks and reds. I also used the tiny heart pictured and another background stamp that has three tiny dots on it.I punched out the wings using my Marvy scallop circle (the blue one) and I stamped them with an Inkadinkado stamp. I used stazon blazing red to do that. I stamped on both sides of the scalloped circles so that when folded, everything would be covered. I then made the folds and then used my prismacolor red and roughly colored around the edges and creases. I then used a blending stump and baby oil and blended the color into the wing.I cut the body out with a wine bottle shaped punch from Marvy. I punched two out and adhered them together at the necks. I punched the heart for the butterfly body with an EK Success punch. I then colored it with a black prismacolor pencil and blended it with the baby oil and stump.I punched the large heart for the sentiment using a Marvy punch. I then put together the butterfly on the background by first positioning the body, then each of the wings. Then I put on the heart with dimensionals. I used brown wire for the antennae and adhered them underneath the body. Then I stamped the sentiment on the heart and used the red pencil and baby oil around the edges. I then adhered that to the wrapper. After everything was attached, I used stickles on the wings and around the folk heart.Then I put diamond glaze on the body to make it stand out a litte more. That's it! I then let it dry before I wrapped my candy bar! Thanks for stopping by! What do you think?