Wednesday, January 11, 2012

Paper Bag Flip Album


Hi everyone!  Hope you all had a great Tuesday!  Thanks for stopping by for a visit!  This year, (and I don't normally make New Year's Resolutions), I am hoping to keep up with my blog more regularly.  When I first started a couple of years ago, I was doing pretty well.  LOL!  But of course you all know how life takes over!  Unfortunately, I let it really take over!  LOL!  Anyway, I have a mini to share that I made several months ago for a dear friend who lost her father.  I used a tutorial from Laura @ Follow the Paper Trail on her paper bag flip album.  
This was a super fun mini to make.  It came out rather thick as you can see!  lol.  It is made with a chipboard cover and spine and the closure is Grunge Paper from Tim Holtz.  It is held in place by a small disk magnet from Basic Grey.  
The spine is covered with brown canvas from Joann Fabrics. All of the fibers and ribbon are tied onto 2 D-rings from Tim Holtz.  The charms are assembled on a Swivel Clasp, also from Tim Holtz.  

This is the first page.  I have yellow sticky notes on the photos to protect identities.  The reason this album is called a flip album is because you flip the direction of the opening of the bag from page to page.  So the opening on the first page is to the right.  The second page the opening flips to the left, and so on.  
I have handmade most of the flowers in this book, except for the really small ones.  In most cases, the flowers are punched from paper first and then distressed and layered together. 
The phrases in the frames are ones that I printed from my computer.  The dangling charm is a Tim Holtz Fragment with paper adhered to the back.  
I used ribbon and silver washers from the hardware store.  I distressed the washers with Tim Holtz alcohol inks to get the desired color.  They came out a bronze-y, aged finish.  
The side pockets are made from Tim Holtz on the edge dies.  The pearls on the edge of the lace are individual pearls that I hot glued on.  The tags are made with my Cricut.


The initials are from Making Memories.  I printed Twinkle Toes on one of the tags because they loved to dance.


A rolled rose that I made and some Prima Bling!


Like I said, this was a super fun album to make!  It wasn't super fast, but it was fun.  I enjoyed every minute I spent making this very special album.  Video to this album.

Thanks again for stopping by and if you have any questions, please don't hesitate to ask!  

Hugs,
Rachel


Saturday, January 7, 2012

Shopping Organizer


Hi all!  Wanted to share this shopping organizer I made for 2011's Christmas Season.  Laura at Follow the Paper Trail has a wonderful you tube video showing how to make one.  Super easy instructions and very quick to make!  I added a pad of paper that I made (not shown) to the right side of the organizer under the word Lists.  I will take a picture of that and share that as well.  I didn't use a post it note paper pad as Laura had done.  This was AWESOME to carry around with me as I was shopping!!  It kept me very organized and kept everything in one place.  No more separate notes on different pieces of paper all over my purse!  All of my gift recipients had a separate sheet on my pad of paper and I check marked each item from their wish list as I purchased them.  This made sure that I bought the same amount of gifts for each child, which is very important in our house!!  LOL!!  I kept all the receipts in the pockets as well.  I tied a jingle bell on a string and wrapped it around the snowflake on the front cover so that I could hear if "someone" was being snoopy!!  :)  Anyway, this is going to be a tradition from now on; to make one of these every Christmas or simply re-use this one every year!  Thanks for visiting me and please ask if you have any questions.... hugs!

Friday, December 9, 2011

Christmas Goodies!

Hey Everybody!!  I can't believe I made it back to my blog!  It had been so long since I had logged on that I couldn't find it!  But TaDa!!  I found it. lol.  
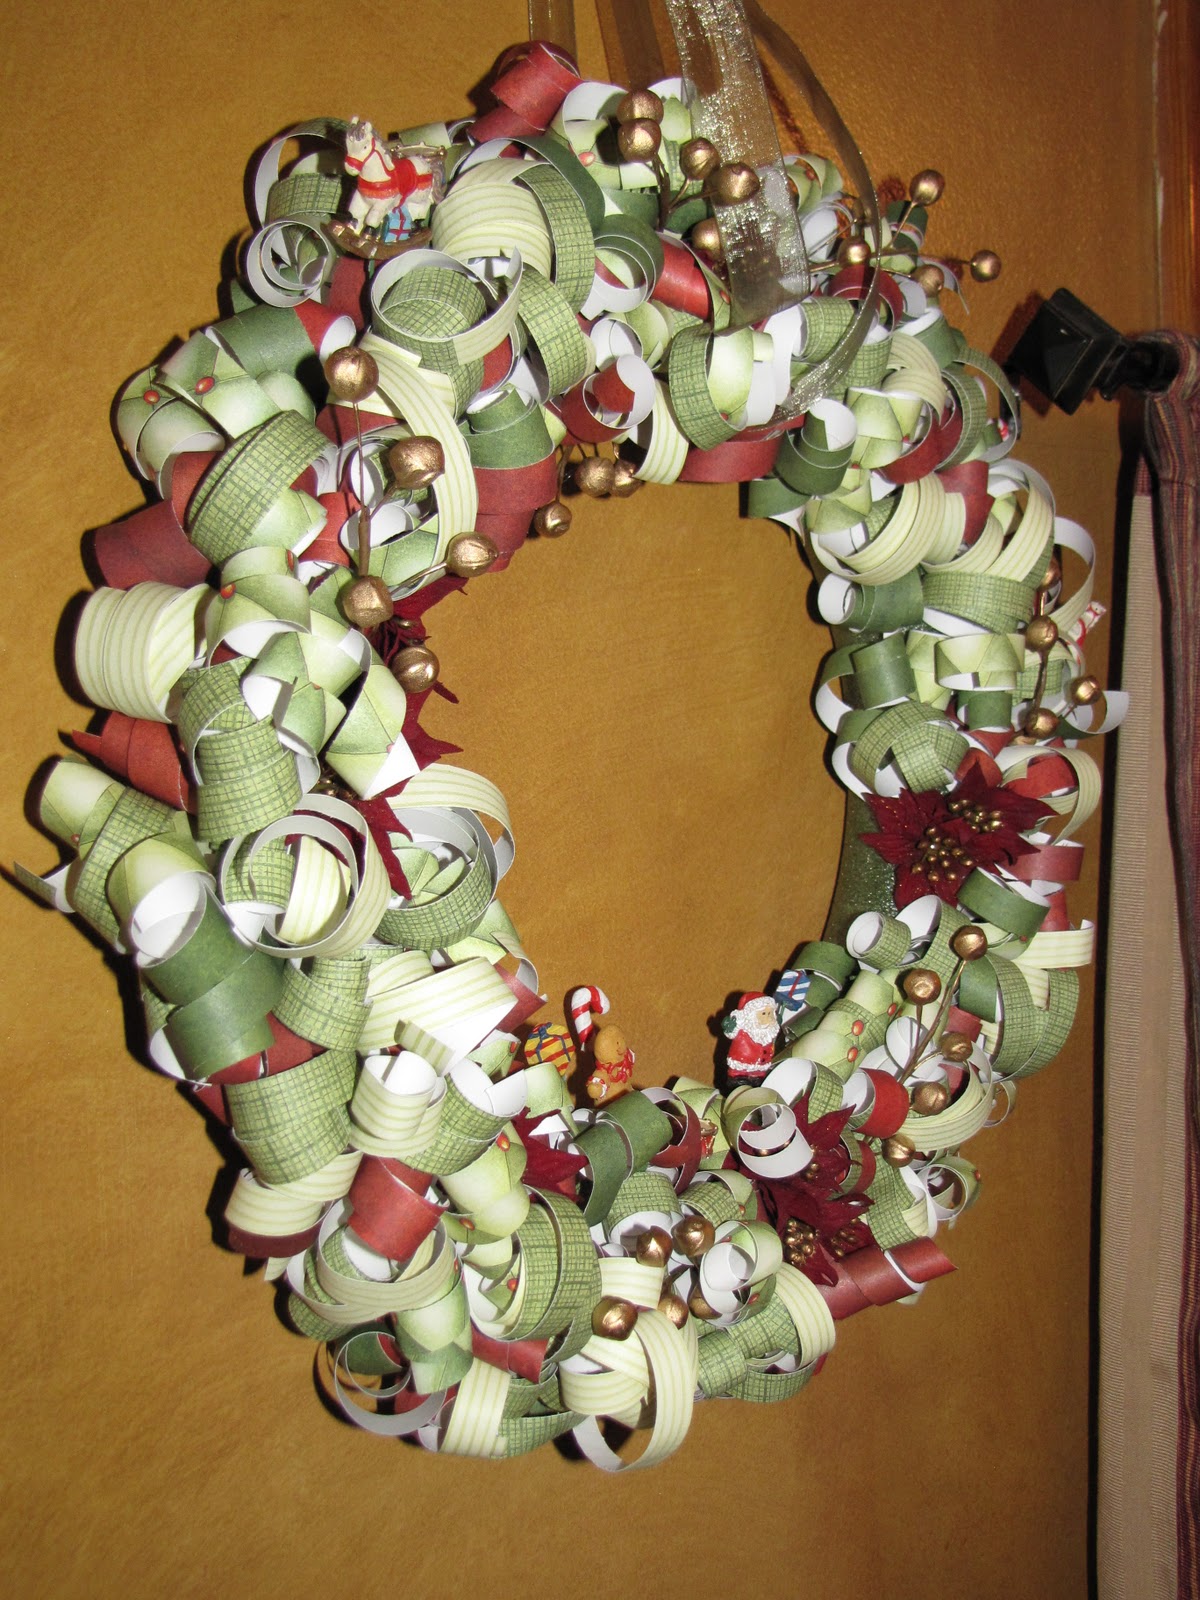
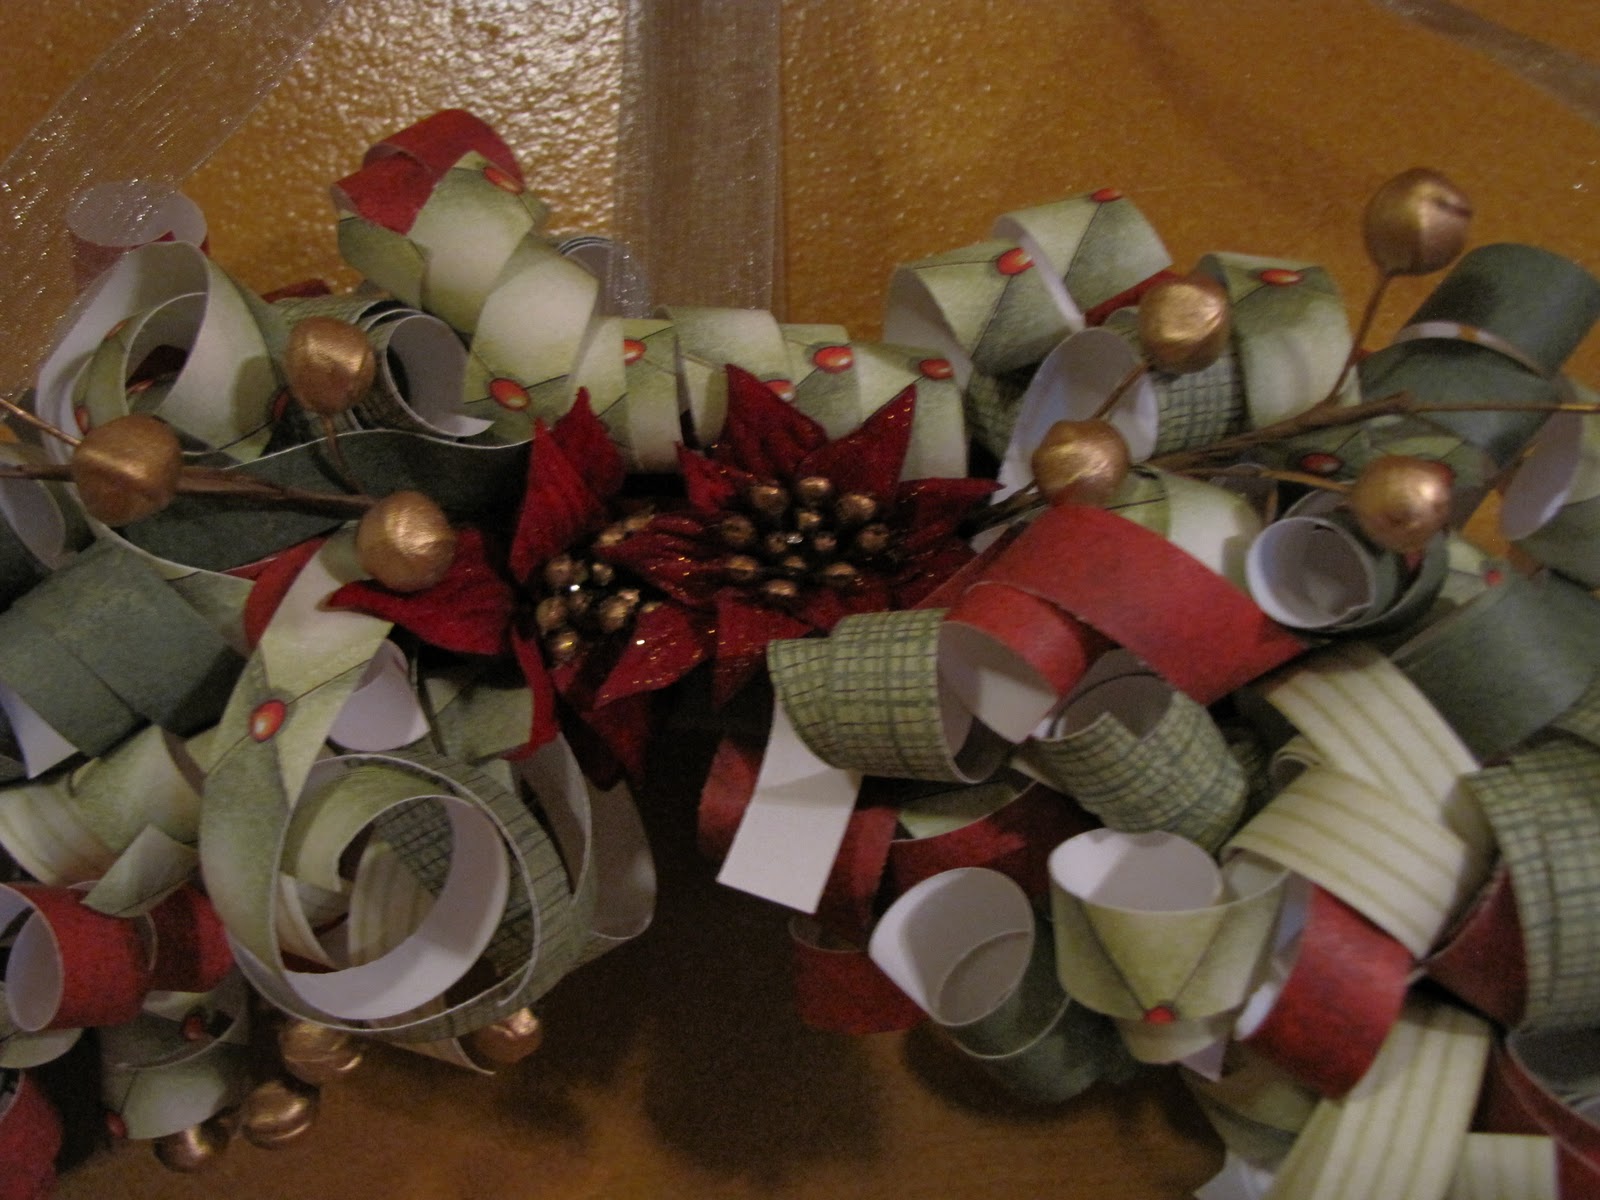
I can't believe the Christmas Season is here again already!  I have been hard at work finishing up some projects! Today I have a curly paper wreathe that Shellyb140 (on youtube) showed how to make.  Hers are so stinking cute I had to try on. I will probably make a few more! But here is mine. I used some old Stampin Up paper that came in a scrapbook kit.  I also used some odds and ends that I had stashed away in my Christmas decorations.They are so easy to make and they don't take long at all. This was done in one evening. You just cut 1/2" strips from 12x12" patterned paper, curl them like you would curling ribbon and use stick pins with the tiny heads on them to poke through the paper and into the hard green styrofoam wreath.  Not the white wreathes that crumble when you touch them, but you want to use the green hard ones (in the same aisle at the craft store). Really there is no rhyme or reason to this, I just poke away! And I love how it turned out. I have it hanging to the left of my dining room window. I have to make another for the right side lol!!  Anyway thanks for stopping by. If you have any questions, please ask away!!  Take care!!! Hugs, Rachel


Tuesday, February 15, 2011

Hello Friend...

Wow! I can't believe how long it's been since I have posted!!  I tried to post yesterday and for some reason I couldn't log on and see my dashboard!  So I posted pics to my facebook page instead.  I thought that my blog was deactivated or something!  Anyway, I have several cards to share but I am only going to post one a day so it looks like I make cards everyday!  LOL  But in all actuality, I made them all in one weekend!  ;)  I have been watching and following Kristina Werner's blog forever now and she has been the inspiration for all of my cards lately.  I love her designs; the simplicity of them and how easy it is to finish a card!  Here is the design I fell in love with.  The cardstock is from Stampin' Up, as well as the ribbon.  I also used Versamark ink and Martha Stewart Crafts embossing powder.  The scallops are made from 3/4" circles.  The corner rounder I used is the Corner Chomper from We R Memory Keepers.  Thanks for stopping by; I know it's been awhile!  :)

Saturday, September 4, 2010

Happy Summer!!!

Hi!!! Man I miss blogging and keeping up with projects. :-( I haven't done a thing creatively in SO long! This year has just been so rough with this deployment. I don't have any free time with both kids in Taekwondo and soccer. I am constantly running the roads! But the good news is that I have purchased some huge shelving units from a LSS that is closing and right now I am in the process of cleaning my room and packing things up to get it ready for the new shelves. I am so excited because they were made specifically for stamps so they are shallow and don't take up a lot of floor space. I will finally look organized! Sad thing is that i actually have enough stamps to fill two units, both 8 feet long and 8 feet tall!!! It's amazing what you accumulate in just 5 years! LOL. Anyway just wanted to check in and say that very soon I will be able to create in my room again! I can't wait! Have a wonderful September! Summer is winding down......

Wednesday, January 6, 2010

Happy New Year!

Wow it's a new year! I can't believe it! It would be awesome if I could say that I've been swamped making projects and cards and scrapbook pages! Not the case! I did make a few Halloween cards and Christmas cards, and a couple little Top Note boxes for Christmas, but I don't have pictures yet to share. One of my new hobbies is Facebook! OMG! I never thought I would start that but it's been addicting! I now have a farm on Farmville, a farm on Lil' Farm Life, and an apartment at Yoville! LOL. It has been one of those mindless activities that has proven to be very distracting for me. And right now I need some distraction, believe me! The deployment I referred to is fast approaching and I am not looking forward to it! But hopefully, I will be busy enough to pass the time quickly. I plan to keep up with my blog this year. I am not one to make New Years Resolutions since I never complete them, but keeping busy is going to be a priority! My kids, my work, my friends, and my hobbies should be all I need to get through this deployment! Thanks for checking in with me! I hope that you all have a wonderful New Year!!!!!

Friday, June 12, 2009

Long time no see....

Holy cow it's been a long time since I posted! I haven't made a thing since that flower pot card except for bracelets! Katie and I started beading a few years back and we made a bunch of earrings. Recently I bought a couple of new blouses and wanted to make matching bracelets so that's what I have been doing lately. But the month of May was really busy for me. I had my brother and sister-in-law visiting and we had the burial for my uncle. My boss was on vacation AGAIN so I had to work a lot. Katie decided to go to another high school prom even though she's in college now, so we had fun preparing for that. The kids have been very active with Taekwondo this year and Monday is their last day of school. Right now, Katie and one of her best friends are vacationing in California. They flew out yesterday. And hubby is guard training this week. So the kids and I have been trying to come up with things to do! Last weekend on the 6th was my birthday so the kids and I went shopping and out to dinner, which was really fun. We didn't get home until 10:30 pm! My boss decided she wanted to deploy overseas to work at an AAFES there and she leaves in July. We have been desparately trying to find another employee since I will be temporarily promoted to her position. We need someone to fill my position while she's gone. I can't work in that store by myself for 6-7 months! Her timing really sucks because with hubby deploying early next year, he's training a lot this year and I wanted to take some time off. With her gone, I can't do that so I was really upset when she announced she was leaving. But I just have to deal with it and make the most of it, right? Anyway, I can't believe it's been so long since I checked in. Sad to say but I just haven't had the time! But I appreciate you continuing to check in! I hope you have a wonderful weekend and hopefully I will see you soon!

Monday, April 27, 2009

Flower Pot Pocket Card TLC215

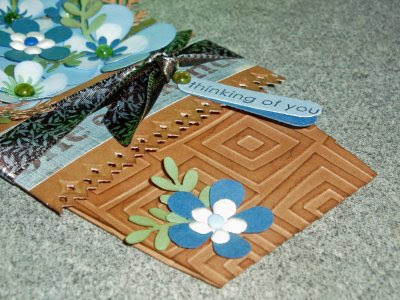
I loved making this card!! What a fun challenge. A little time consuming because you have to glue lots of layers together and I had to use tweezers but it was relaxing to be honest. I love how it turned out. I used a multitude of flower punches and leaves and the branch punch. I used dew drops and brads for each center. This requires LOTS of wet glue; not glue stick or glue tape runner thingies. I used a paper piercer to apply the glue to the backs of each flower to stick them on. My husband came down and I showed it to him and he said, "now why don't you mass produce that and send it out to people???" I whipped my head around to look at him with this dumbfounded look on my face and said to him, "WHAT???.......do you know how long it took me to make this card????" LOL I started making this last week! Then I got sick (brochitis) and I finally finished it this afternoon! Sometimes he kills me! LOL

This is a technique lovers challenge on SCS. I posted the link in an earlier post but in case you missed it, here it is again. You gotta check out the gallery; so much inspiration there! Here is the card laying down so you can see the dimension.I used a larger size stylus and a foam pad and laid the flower on the pad and made little circular motions with the stylus in the center of the flower. This brings the petals up and pushes the center down. Then I glued each layer together and added a dew drop. The ones that have brads, I didn't use glue to put the layers together. The brads hold the layers together.Here you can see the embossed pot and the punched edge of the pot. I used a Martha Stewart border punch and I used my Cuttlebug to emboss the pot. After both of those things were done, I used a sponge and close to cocoa ink and swiped it across the pot so the dimension would pop.Here you can see the card with the flowers taken out. I used the same border punch to punch the blue cardstock.
This was fun fun fun! And not that hard. The instructions for the pot are very simple and you can find those instructions by clicking here.

Thanks for stopping by today! I am glad you checked in! What do you think of my cute little pot? :)

Sunday, April 19, 2009

Happy Sunday

Hi everyone! Thanks for checking in! Kids are on spring vacation this week. I am so excited I get to watch my shows tonight and stay up late and not have to get up early tomorrow! LOL. Today I am taking my daughter to her play date while I run some errands.

Spring has finally sprung here in Vermont..........I think! LOL. Our mountains still have snow and they have still been getting some random snow even into April. But here, we are in the high 50's low 60's and my daffodils are sprouting! I love living in a place where I can plant perennials once and forget about them! :)

With Spring here, I've really been wanting to make a card called the Flower Pot Pocket Card. Have you seen it? SCS has a great section dedicated to challenges. They have Color Combo Challenges, inspiration challenges, cards sketches, etc. The flower pot pocket card is in the Technique challenge. Look at the gallery of cards people have made. They're awesome!!! You can find the directions to make this card here. I have made the pot portion but haven't gotten around to making the flowers yet! LOL. You should check them out. You will probably get farther along than I did! LOL

Have a wonderful Sunday......I am off to get ready to take my daughter to her playdate! I hope you are enjoying your spring weather as well!

Saturday, April 4, 2009

Happy Saturday!

Hi everyone; thanks for stopping by and checking in with me! I have a busy weekend planned starting with today and birthday shopping! Lauren turns 7 on Monday! I can't believe it! She has some birthday money she wants to spend today starting with going to get a new bike! So we are visiting the mall, Toys R Us, Walmart, Michaels (for me), and then daddy is meeting us for dinner. He has drill this weekend. :( Tomorrow is Lauren's party. She chose to have a bowling party with 5 of her friends. We did this two years ago for our son and Lauren had a run in with a bowling ball and busted her chin open. She swore against bowling parties forever! Poor thing. But she recently had a day trip to the bowling alley with a spring vacation camp she was in and she saw that the step she tripped on at the bowling alley had been removed and now the whole bowling alley is flat! She loved it! LOL She she was eager to have her party there this year. Monday, I am taking cupcakes to her classroom, so I have to get all the fixins' for that as well. A busy weekend with not much time for playing in my room. But that's okay; it'll be a fun weekend for the family. The only downside is that yesterday I came down with a cold! I don't feel horrible but it's just irritating! Anyway, I hope you all have a wonderful weekend! I bet most of you are enjoying the long-awaited springtime weather! We are just about there temperature wise but we are getting one rain storm after another these days. I do not like "mud season." LOL. Have a great weekend and I will see you soon! ;)

Monday, March 30, 2009

Punched Bunny and Easter Card


Hi All! Can you believe I have a couple of projects to share? I can't! I seem to have no time for fun this year! But I saw this little bunny on Amy's blog, and had to try one. I went over to a friend's house and together we read Amy's great instructions and made one! Look how cute!I love him! He's much smaller than I originally imagined; only fitting maybe two chocolate nuggets inside. But the great thing is that he's made from punches only! A little bit of white gel pen and black marker, ribbon, pompom, and dew drop, and viola! You have a bunny! I love this little card. He came in a clear stamp set from SandyLion. I found it at Michaels. I stamped him on SU watercolor paper using India ink, colored him with SU watercolor crayons, filled his belly and ears with fun flock, and cut him out. I stamped flowers from the same set using the Rock n' Roll technique. I then sponged in clouds, and the grass and added some yellow with a sponged on top of the flowers. I then cut a strip of garden green cs and made tiny little cuts in it and rolled the top edge with a pencil and my fingers and attached it at the bottom. I added sheer ribbon and three dew drops. He's a little more yellow than I intended but I think he's pretty cute! :) Watcha think? Thanks for stopping by today! Have a great week!!

Sunday, March 29, 2009

I unsubscribed from my updates....

Hi all! Thanks for visiting me! I wanted to explain something that I did today......I have a TON of blogs that I subscribe to. I've accumulated quite a list of updates in the last year. So much so that I had almost 2000 emails in my inbox!!!! I can't check my email daily like I used to and I got overwhelmed by all the updates. So I'm in the process of deleting them from my inbox which isn't fast with Comcast, I am down to 1437 now! LOL .....I went to FeedBurner and unsubscribed from all my updates! Not sure if I am going to regret that in a few days or what! lol........But I wanted to let you guys know that I didn't do it as an insult to any one of you. And I didn't pick and choose from my list; I deleted them all. I DID put all of you on my favorites list so I can visit you all often though! I realized afterward that individually, you will receive an email stating that I unsubscribed from your blog and I wanted to explain why so that you wouldn't feel I was being mean.
I hope you all have a wonderful rest of your weekend and thanks for checking in and reading my explanation! :)

Sunday, March 15, 2009

St Patrick's Day card...third post today

Hi again! Just got back from soccer and grocery shopping. Even got my van washed today! The weather has been awesome the last few days! Spring might be here.....lol. But I won't hold my breath because you never know when a freak snowstorm will hit here in Vermont! I made this card a couple of weeks ago. I love how it turned out. It's much better IRL though! I have to admit however that this is not the layout I intended when I started making this card! There weren't supposed to be 5 mugs going across the card, but I made a boo-boo and had to cover it somehow. Believe me, cutting 5 mugs out wasn't my first choice for this layout, but when I finished I loved it! There are lots of dimensionals on this card!

I used my Prismacolor markers to color the mugs in. And I love this Martha Stewart border punch. This card was a little time consuming but in the end I think it turned out pretty cute! :)

Thanks for stopping by and visiting me today! Have a wonderful day!

Second post for today

These cards were really fun to make. Sorry I am showing them to you so late! lol I really love the card with the scallop cut out at the top. This idea came from Dawn's Stamping Thoughts.
Have a wonderful day! I am off to take the kids to soccer! Thanks for stopping by!

More pics related to yesterday's post

Hi again! Thanks for stopping by today. I couldn't get back to my computer yesterday so here I am today. These pictures are related to the cards I showed you yesterday but with different angles; just to share with you the depth of each card. It's amazing how much detail a little dimension adds to your card!

In the card above, I used a square punch and then cut the middles out with scissors. I don't have the photo corner punch otherwise I would have used that. The scalloped one is a Cuttlebug die. I added dots with a glitter pen.

On the card with the lion, both of those stamps are from Rubber Soul. I stamped the lion on the card itself and then I stamped him again on a scrap piece of paper and then cut the head out to add to the card. The red heart is on a dimensional and I used a glue pen and glitter to make it stand out from the other hearts.

Thanks for stopping by today; I do have more photos to share....have a wonderful day!

Saturday, March 14, 2009

Wow it's been so long!

Thanks so much for checking in! I haven't been on my computer for 12 days! And I haven't posted on my blog in over a month! So sorry I've been away for so long. I don't have the time I wish I had to create, or even be on my computer. But I do have some pictures to share with you. I did manage to make some cards while I've been gone! lol. I had a friend over to make Valentine cards last month. I was happy with what I was able to finish! Now I know Valentine's Day is long gone and we are fast approaching St Patty's Day but I really wanted to share them with you. Some of these ideas I saw on Dawn's Stamping Thoughts. She is super creative and her layouts are so fun and easy to recreate. For these cards I used a combination of Stampin Up paper and a paper pack from Michaels. The inks are Stampin Up.

Here's a supply list for all the cards above:

Stamps: Stampin Up Love You Much set, Bear (Rubber Soul), Hello Friend (Wordsworth by Rubber Soul), tiny Heart (Rubber Soul)

Ink: Stampin Up Pink Pirouette, Riding Hood Red, Basic Black, Close to Cocoa

Accessories: Markers from Stampin Up and Staedtler, Glitter pen, glue pen, Martha Stewart border punch and glitter, heart punch from Love You Much Bundle, 5/8" circle punch from EK Success, 7/8" circle punch from EK Success. Marvy scallop circle punch, Stampin Up Scallop Circle Punch, dimensionals and foam tape, paper piercer, white gel pen, Cuttlebug and embossing folder.

I have more to share with you but I will come back in a little while and post again. Thanks for stopping by!!!!

Monday, February 2, 2009

MIA...

Hi everyone! I've been MIA lately. But that isn't much of a surprise is it? LOL. Life has been a blur these past couple of weeks. I haven't been able to sit down and make anything for awhile. Well, since my last kitty card! I am itching to try so many things but don't have the time or the motivation right now. I hate those days! I have a new MS border punch that I wanna try, and several Valentine's Day stamps.

Today I have some running around to do, but later on today I might be able to get down here and make some cards. That's if my hubby goes to play basketball tonight! LOL. So I may see you later. Have a wonderful Monday!! Thanks for checking in!