Friday, July 5, 2013

Design Team Project for Ephemera's Vintage Garden

Hi Everyone!  Thanks for stopping by today!  I have my first project for my Guest Designer spot for Ephemera's Vintage Garden!  Yayyy!  I was so excited to work with this fabulous journal card kit.  It is called Coral Blues Scrap Journaling Card Set.  It is absolutely gorgeous!  For this first project I had the digital papers printed at Staples on Matte Photo Paper.  The print quality is fabulous!  I wanted to show the versatility of this set because it can be used for far more than just Project Life journaling cards.  This month I will show you the many ways this set can be used!

I decided I was going to make a set of Thank You note cards.  
First, I cut apart the six 3x4" journal cards, and the accessories.  Then I inked all the edges with Tim Holtz Distress Ink, Walnut Stain.
 Next, I used my Tim Holtz Alterations Die, Tattered Florals to cut flowers from the design paper.  I knew I wasn't going to use these tabs for this first project so I used those!  I placed the tab over the smallest flower in the die, and ran it through my Cuttlebug.

In the photo above, you can see all my flower shapes.  I used other small journaling cards from the set to cut the larger flowers. Next, I used my stylus to curl up the edges of each flower. 

In the picture below, you see my six "thank you's."  I used a stamp from Savvy Stamps.  I stamped it using Adirondack brown ink.  I inked the edges with Walnut Stain Distress Ink.  I then cut them out with scissors.
 Once I had all my pieces cut and inked, I began to assemble my cards.  I used Stampin Up card stock in Soft Suede as my card bases.  The finished card is 3.25 x 4.25".  I used Recollections Signature paper flowers, my Martha Stewart triple Butterfly Punch, an EK Success Butterfly Punch, and a pearl bead for the flower center.  I cut a fish tail in one of the strips of designer paper and adhered the sentiment to it.
 This is the inside of the card.  The designer paper is SO easy to use!  They are gorgeous!  You don't have to do anything else.
For my next card, all I did was use pieces from the accessories sheet, like the button and fish tail cut paper.  I added embroidery floss to the button, which I punched out using my EK Success 1" Circle Punch.  A super simple card to make but really sweet!
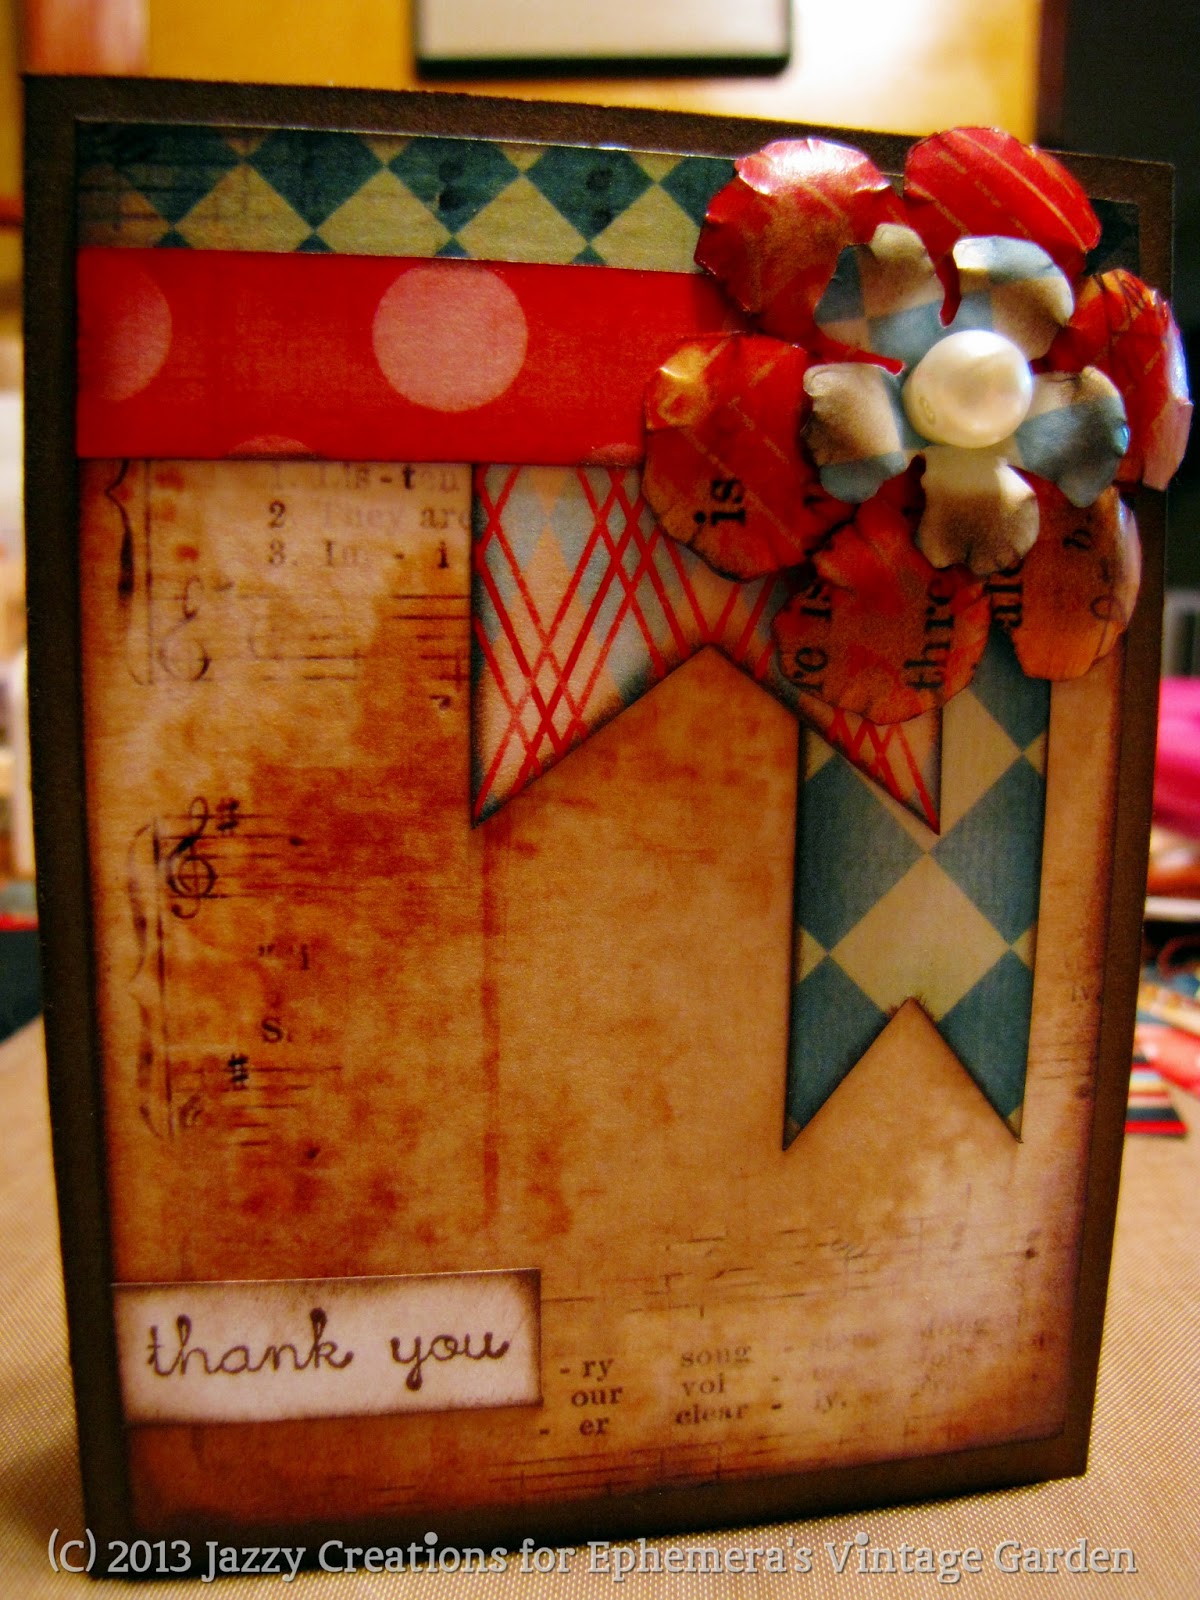
For my next card, it was just all about layers.  I used one of the 3x4" journal cards as the first layer, then the polka dot strip, which I simply cut from the accessory sheet.  I used the argyle fish tail cut paper, and the diamond fish tail cut paper from the accessory sheet.  The flowers are cut from other journal cards, and I added a pearl bead to the center.
 This is the inside of that card.
For my next card, I added embroidery floss to the top of the journaling card before adhering it to the card base.  I tied the sentiment to the floss before adding the butterfly on top.  The flowers again are cut from extra journal cards with the pearl bead. 
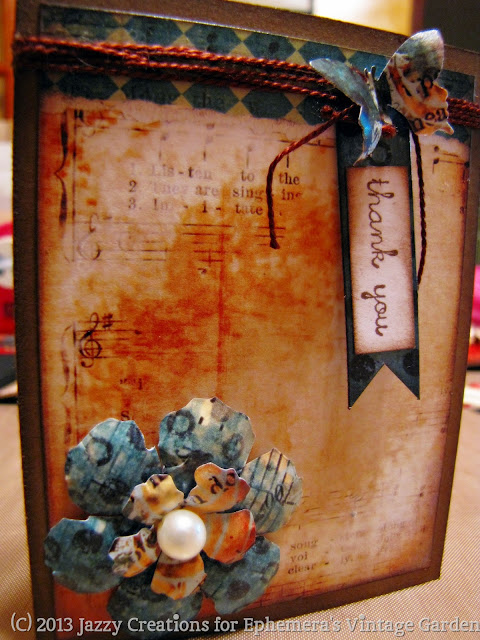
For my next card, I chose to go really simple but with this paper, it looks like I put a ton of work into it!  I used a Recollections flower with a flower I cut from the paper, embroidery floss, a pearl bead, and the fish tail banner hanging from the floss.
And for my last card, I used a 4" doily that I distress with walnut stain, two Recollections Flowers, and a butterfly cut from the designer paper.  Isn't it sweet? :)
 Here are the cards together....  I had such a ball making these cards today!  I hope you enjoyed seeing them come together and I hope you'll stop by Ephemera's Vintage Garden to pick up your set!  :)  I will be doing a video on these cards as soon as I get my voice back!  I have a cold that has taken it away for the time being!  LOL!
What's my next project?  You'll have to come back to see!  Thanks for stopping by today!!

Happy 4th of July!!

 
Happy 4th of July!!  Thank you for stopping by for a short visit!!  I hope you had an amazing day!!

Tuesday, July 2, 2013

Christmas in July - Planner/Organizer

Hi Peeps!  No it's not Christmas yet!  LOL!  I thought I would share this book again since I have nothing new to show you at the moment. LOL!  This book is about 3 inches thick!  Approximately 6x9".  I used chipboard covers and hinges to construct it.  In the picture below, I left the bead work incomplete so you could see the binding.  I just used various beads in colors that matched the paper collections.  The card stock on the covers is Bazill card stock.  I don't remember the color. All of the kraft card stock is from Stampin UP.  
The paper collections I used are My Minds Eye Snowed In.  My Minds Eye The Merry Days of Christmas. My Minds Eye Lost and Found Holly Jolly.  The divider tabs are scallop punches.  The stamping on the tabs is individual letter stamps from Just Rite Designs.  I did a search on their website and I don't believe they are available anymore.  The letters are so tiny I have to use tweezers to use them!  
 The tabs say; Traditions, Holiday Recipes, Breakfast, Recipes to Try, Treats, Pantry Inventory, Freezer Inventory, Menu, Crafts, Gift Lists, Gifts to Make, and Addresses. 
  In the picture below, you see envelopes.  They are coin envelopes that I covered with design paper.  The flaps have Basic Grey Magnets on them.  There are also clear protector sleeves scattered throughout the book for photos, or magazine clippings, or favorite recipes.
  The the paper collections I used are all single sided papers, I adhered two sheets back to back and then also included white printer paper for note taking and writing out addresses. 
I thank you for stopping by and I hope you enjoyed a quick peek at my Christmas Planner!  Have an amazing day!

Monday, July 1, 2013

Junk Journals! - Photo Heavy

So one of my favorite things to do is make journals!  I love everything about it; gathering my papers, bags, envelopes, doilies, cardstock, graph paper, and other supplies.  I love the creative process. In the pictures below, you see three different journals.  The one on the right I've used various Dylusions sprays and homemade sprays.  The one in back, I've use tea dyed and coffee stained papers, and the one in the front middle, I used cardstock at the cover. 
  The first one I'm going to show you is the one on the right.  The one I used Dylusions Sprays in, as well as homemade sprays.  The stamping is done using dollar bin stamps from Michaels.  The pages are all made of cardstock with some having patterned paper attached to them.  I distressed all the edges of the pages using a handheld distress tool from Making Memories.   The covers are made from a recycled muffin box.
 
Here is the video I made on this album.
  
The journal below is the one in the middle with the cardstock covers.  I sewed three sheets of cardstock together and scored it to make the spine.  I then inked the cover with Tim Holtz Distress Inks in various colors to get the "leather look."  I totally love how this one turned out!  In the pictures below I am just sharing a few of the pages in this journal.  I've used my sewing machine to sew together various scraps of paper with doilies and then glued them to the page in the journal just along the edge so that I could use the grouping at a "tuck spot."
  In the picture below this is an envelope that I cut the flap off of.  This envelope has been tea dyed.  I glued on a doily, book page, and pattern paper scrap just to dress it up a bit. 
Here is the video I made on the book above.
And here is the video I made on the journal on the left.
These journals are so fun and easy to make.  I hope you are inspired to make your own!  Hope you have an amazing day!  Thanks for stopping by!

Saturday, June 29, 2013

Tiny Junk Journal

Hi Peeps!  Blog post number 2 for today! Woohoo! This is the other tiny junk journal I made for my partner Debbie.  These little books are addictive and so cute!!  This one I made a tutorial series, links will be at the bottom. 
The cover is made from a Celebrate It brand paper bag.  The patterned paper is from DCWV Butterfly Garden Stack.  I LOVE this paper!  It's cardstock actually, so it was great to add stability to the covers.  I added a button closure to the front which was really easy to do.  I just stitched in on just like you would a button on your clothing.  I stacked two buttons for this closure.  Seam binding is attached to the back cover which then comes around to the front and winds around the buttons. 
In the picture below, you can see I used doilies to highlight the opening of the pockets.  A tutorial on how to do this will be listed below. 
In the picture below, you see the top of my pockets have a semi circle punched in the middle.  This is for easy removal of the tags.  The doily is 4 inches in diameter and the semi circle was cut using a 1 3/8" circle punch.
The die cuts are from K & Company Julian collection.  Here you can see I used a coin envelope as well.  they make great little pockets.
In the picture below you see all the tags that are included in this junk journal.  I found a Definitions stamp set from Stampabilities and I stamped a different definition on the backs of all the tags.  I found this stamp set at Hobby Lobby but it is available on their website as well. 

All the tags have seam binding attached to them that I tea dyed and wrinkled.

Here are the four videos I recorded on this journal showing step by step how to make one.  Thank you for stopping by and visiting!


Vintage Tiny Junk Journal - Photos and Video

Happy Saturday everyone!  So during my lapse in blogging since September, I have been a busy crafting bee!  :)  I decided I would share those projects one at a time with you all.

I am in a group on Facebook and several of us joined a swap for Tiny Junk Journals.  I made two different ones for my swap partner.  She really loves vintage so the first one I made I did just that.
 I used a file folder for the cover and distressed all the edges with Tim Holtz Distress Ink, Frayed Burlap.  The pages are made from regular copy paper that I tea dye and coffee stained.  They are sewed into the cover using the Pamphlet stitch.  


The patterned paper that I use is all from the My Mind's Eye Sunshine Collection.  I used a 6x6 pad.  I also used tea dyed book pages, tea dyed doilies, tea dyed shipping tags and various stamps. I also added tea dyed seam binding to all the tags, (not pictured).

Here is the video if you would like a closer look!
 
Thank you so much for stopping by!  I will share the other junk journal in a separate post.  I hope you have an amazing day!


Thursday, June 27, 2013

I'm Back!! And with an EXCITING announcement!!

Well, I will admit once again, I am a BAD blogger!  I'm on a roll for a few weeks and then poof!  Inspiration's gone!  Well this time, my comeback brings AWESOME news!  I am a Guest Designer for July for Ephemera's Vintage Garden!!  Woohoo!!!  Debbie-Anne who owns EVG approached me recently and asked if I would be interested in being a guest designer for the month and I was SHOCKED!  I am sooo honored that she asked me and of course I said yes!  Here is the link to her online store.  She designs amazing and gorgeous digital scrapbook papers for all of our paper crafting needs!  Her printable designs are stunning and she offers them at very reasonable prices!  Please check her out if you haven't already! 

This is the kit I will be working with for the month of July.  I plan to make several projects with this kit to show its versatility, and the convenience of being able to print the designs on your home printer or at your local office supply store.

I am so excited to get started with my projects.  I will feature them here on my blog as well as you tube videos.  I hope you can join me and maybe be inspired to pick up the kit yourself and make some yumminess with it! 

Thank you for stopping by.  Hope you have an amazing day! 

Thursday, September 20, 2012

Studio Calico Yearbook Collection

Oh my GOSH!  I must get this collection!  Have you all seen this?  I'm sure you have; I'm the slow poke on this stuff.  lol. This is Studio Calico's fall themed collection, called Yearbook.  
6a0133f3181fde970b01774326f50b970d-800wi
You can purchase paper packs from The Beary Scrap
6a0133f3181fde970b0167684bff21970b-800wi
6a0133f3181fde970b0167684c1950970b-800wi
You can purchase the stickers above from my lovely friend, Kimm at The Beary Scrap
6a0133f3181fde970b017743271ac4970d-800wi
The paper clips above and the mask below are also available from The Beary Scrap.
Yearbook Hexagon Mask
Yearbook 12x12 Alpha Sheet
I absolutely love this collection!  Can't you see this in a daybook or an awesome mini album?  OMG, I love this time of year!

Thanks for stopping by!  :)

Wednesday, September 19, 2012

Lovely Visit to the ER...

Had a fun evening tonight!  NOT! Had to take my son to the ER tonight to have a bug bite looked at.  He was bitten in June and had seen his primary doctor shortly after.  He was given a topical antibiotic ointment to apply several times a day, in hopes of that taking care of it. Nope! It got bigger and the bump got harder.  His doctor told us that he may have to have it cut open and cleared out, which is what we had to do tonight. Ummmm, let me just say that Mommy had to lay down! I was given a cold wash cloth and gingerale! LOL! Not a pleasant experience watching the doctor dig in your son's arm like he's digging for gold! But I'm glad it's over and taken care of.  My son was a trooper for sure!  :)

What's on My Wishlist?!


If you're like me, you're looking forward to all the projects that we seem to make for the holidays!  I can't wait to make a December Daily, Christmas cards, Halloween Cards, and Mini Albums!  I saw these cute sets from Dyan Reaveley that I am dying to get!  The reindeer one is currently out of stock at Simon Says Stamp but isn't it so darn cute?! I love it!  
*Dyan Reaveley CHRISTMAS ACCESSORIES Stamp Set Dylusions Cling Unmounted Rubber

http://www.simonsaysstamp.com/servlet/the-47020/Dyan-Reaveley-CHRISTMAS-ACCESSORIES/Detail

*Dyan Reaveley CHRISTMAS BORDERS Stamp Set Dylusions Cling Unmounted Rubber
http://www.simonsaysstamp.com/servlet/the-47021/Dyan-Reaveley-CHRISTMAS-BORDERS/Detail

*Dyan Reaveley CHRISTMAS WORDS Stamp Set Dylusions Cling Unmounted Rubber
http://www.simonsaysstamp.com/servlet/the-47018/*Dyan-Reaveley-CHRISTMAS-WORDS/Detail


I have also been dying to make Daybooks.  They are a smaller version of a SMASH book, from Amy Tangerine.  This is an awesome stamp set that I could use for a homemade daybook for Autumn.  It would also be great for Fall scrapbook layouts.  

*Simon Says Clear Stamps STAMPtember™ AUTUMN Kelly Purkey Exclusive
http://www.simonsaysstamp.com/catalog/kellypurkey_autumn.jpg


*Ali Edwards Clear Stamps GIVE THANKS OCTOBER AE Stamp Set Technique Tuesday
http://www.simonsaysstamp.com/servlet/the-39859/ali-edwards-edward-give/Detail


And for my Halloween Mini Album this year, I am always a sucker for twine!  Look at this cute twine from Doodlebug.  
*Doodlebug HALLOWEEN Doodle Twine
 http://www.simonsaysstamp.com/servlet/the-37916/Doodlebug-HALLOWEEN-Doodle-Twine/Detail


And, how can I forget washi tape??  Love that stuff!!  Here are some that I saw that I just have to have!  LOL
*Cavallini & Company Paper Tape VINTAGE CHRISTMAS In Tin PT/HOLVIN
http://www.simonsaysstamp.com/servlet/the-44360/Cavallini-%26-Company-VINTAGE/Detail
*My Mind's Eye WINTER WONDERLAND Decorative Tape Washi WW1067
http://www.simonsaysstamp.com/servlet/the-47218/WW1067-winter-wonderland-christmas/Detail


Just a couple more things for Christmas!  LOL
*Lawn Fawn SWEET CHRISTMAS Clear Stamps
http://www.simonsaysstamp.com/servlet/the-48633/sweet-christmas-build-a/Detail
*Lawn Fawn FROSTIES Clear Stamps
http://www.simonsaysstamp.com/servlet/the-29252/Lawn-Fawn-FROSTIES-Clear/Detail


So that's my wish list......for now!

Thanks for stopping by!  What do you have on your wish lists right now?

Sunday, September 16, 2012

Craft Room Re-Do

Wow! Why am I so terrible at blogging? lol. I always have good intentions but I can't seem to keep it a priority and keep up with it. I dunno why that is. I suck at blogging. lol. 

Here are some photos of my craft room re-do. I am loving it so far! I am not finished with painting but let me tell you, PAINT DOES WONDERS! I am amazed at the difference. 


Here ^ is one wall. Originally, this wall was just sheetrock; meaning, raw sheet rock that was never mudded and taped.  The sheet rock was actually installed in the adjacent room, not this room, thus the wall studs that are visible in my room. This is a basement room that had 4 walls up and a door and the previous owner used it as his workshop. That pole you see in the foreground is to support the main floor above.  Not a pole that can be taken out, so I painted it since it was dark grey. I had to prime all the walls first and then paint them. 
Here ^ is the same wall with a closet shelving system on it. I bought a system that included all the hardware needed to have all those shelves and rods. I have leftover shelves and brackets to do another wall. This wall is my green and turquoise wall.  I got the wicker baskets from Christmas Tree Shop and the large square baskets from Staples. My desk is an old oak door that the previous owner made and I kept. It has an old table cloth covering it and a large acrylic sheet on top of it. 
This ^ wall is directly opposite the green and turquoise wall. It is a work in progress. I haven't painted the wall yet but the closet system is already put up. I actually move those green baskets to the other side and this wall is pink and brown. The cube system sitting on the desk is from Staples. This wall had pegboard covering it. I didn't take it down. I just installed the shelving unit directly on top. 


Here ^ is a closeup of my green/turquoise wall. I did make some minor changes to it since this picture was taken. lol. I ended up taking my washi tape off the rod. And my paint isn't there anymore. lol

I will share a photo of my pink and brown wall soon. It still isn't painted but I have the baskets where I want them.

Have an awesome day and thanks for checking in!  =)