Saturday, June 29, 2013

Tiny Junk Journal

Hi Peeps!  Blog post number 2 for today! Woohoo! This is the other tiny junk journal I made for my partner Debbie.  These little books are addictive and so cute!!  This one I made a tutorial series, links will be at the bottom. 
The cover is made from a Celebrate It brand paper bag.  The patterned paper is from DCWV Butterfly Garden Stack.  I LOVE this paper!  It's cardstock actually, so it was great to add stability to the covers.  I added a button closure to the front which was really easy to do.  I just stitched in on just like you would a button on your clothing.  I stacked two buttons for this closure.  Seam binding is attached to the back cover which then comes around to the front and winds around the buttons. 
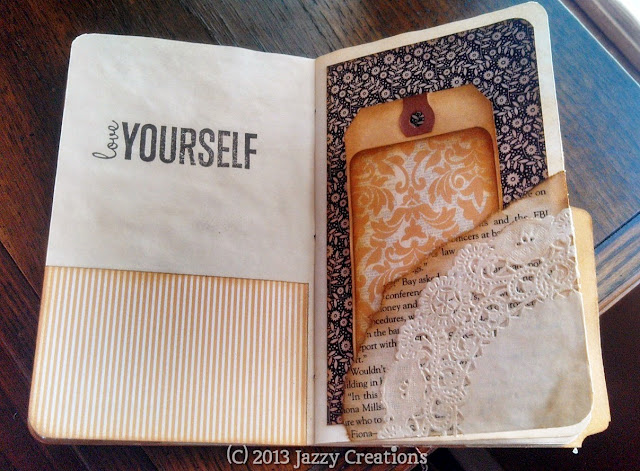
In the picture below, you can see I used doilies to highlight the opening of the pockets.  A tutorial on how to do this will be listed below. 
In the picture below, you see the top of my pockets have a semi circle punched in the middle.  This is for easy removal of the tags.  The doily is 4 inches in diameter and the semi circle was cut using a 1 3/8" circle punch.
The die cuts are from K & Company Julian collection.  Here you can see I used a coin envelope as well.  they make great little pockets.
In the picture below you see all the tags that are included in this junk journal.  I found a Definitions stamp set from Stampabilities and I stamped a different definition on the backs of all the tags.  I found this stamp set at Hobby Lobby but it is available on their website as well. 

All the tags have seam binding attached to them that I tea dyed and wrinkled.

Here are the four videos I recorded on this journal showing step by step how to make one.  Thank you for stopping by and visiting!


Vintage Tiny Junk Journal - Photos and Video

Happy Saturday everyone!  So during my lapse in blogging since September, I have been a busy crafting bee!  :)  I decided I would share those projects one at a time with you all.

I am in a group on Facebook and several of us joined a swap for Tiny Junk Journals.  I made two different ones for my swap partner.  She really loves vintage so the first one I made I did just that.
 I used a file folder for the cover and distressed all the edges with Tim Holtz Distress Ink, Frayed Burlap.  The pages are made from regular copy paper that I tea dye and coffee stained.  They are sewed into the cover using the Pamphlet stitch.  


The patterned paper that I use is all from the My Mind's Eye Sunshine Collection.  I used a 6x6 pad.  I also used tea dyed book pages, tea dyed doilies, tea dyed shipping tags and various stamps. I also added tea dyed seam binding to all the tags, (not pictured).

Here is the video if you would like a closer look!
 
Thank you so much for stopping by!  I will share the other junk journal in a separate post.  I hope you have an amazing day!


Thursday, June 27, 2013

I'm Back!! And with an EXCITING announcement!!

Well, I will admit once again, I am a BAD blogger!  I'm on a roll for a few weeks and then poof!  Inspiration's gone!  Well this time, my comeback brings AWESOME news!  I am a Guest Designer for July for Ephemera's Vintage Garden!!  Woohoo!!!  Debbie-Anne who owns EVG approached me recently and asked if I would be interested in being a guest designer for the month and I was SHOCKED!  I am sooo honored that she asked me and of course I said yes!  Here is the link to her online store.  She designs amazing and gorgeous digital scrapbook papers for all of our paper crafting needs!  Her printable designs are stunning and she offers them at very reasonable prices!  Please check her out if you haven't already! 

This is the kit I will be working with for the month of July.  I plan to make several projects with this kit to show its versatility, and the convenience of being able to print the designs on your home printer or at your local office supply store.

I am so excited to get started with my projects.  I will feature them here on my blog as well as you tube videos.  I hope you can join me and maybe be inspired to pick up the kit yourself and make some yumminess with it! 

Thank you for stopping by.  Hope you have an amazing day!