
I have a new tutorial listed in my shop and until Midnight tonight (5/10/15) you can purchase it for 20% off using coupon code NEWTUTS2015 .... my ENTIRE shop is valid with your purchase of $10 or more. So head on over if you'd like to try one of my tutorials. I currently have 2 listed and I will be adding another this week. In case you're interested in learning how to make this journal, I share detailed, step-by-step instructions in a series of VIDEOS, rather than a written format. You will receive in 3 downloads, the complete supply list with cutting guide which you can print, the link to the project, as well as the password to view the video series. You will learn how to make this journal, cover to cover, including but not limited; a bonus video not shared on my you tube channel showing you how to re-size printable journal kits, making the cover, adding pages, covering the spine, making 5 different pocket and tuck styles, installing a closure, sewing, dying, stamping techniques, as well as tips and tricks I use regularly. You will receive almost 3 HOURS of HD-Quality, video instruction, a printable supply sheet, and access to the photo gallery.
In case you are loving the paper collection I used in this journal, it's called Cottage Garden by Ephemera's Vintage Garden.
The Video for this journal is listed at the bottom of this blog post.
Thank you for stopping by today and saying hello! Have an awesome day!!


Here is the video...


 5-1/2",
  6-1/2",
  and 11".
 and score at 1".
  Now slide the cardstock toward the right side 1/4". That would be the second line from the left side.
  Now score at 7".
 Do the same thing on the opposite long side. Make an additional angled cut at the left edge by trimming just a hair off,
 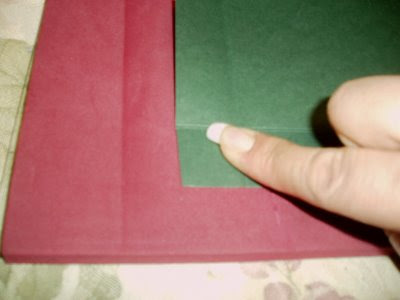 the 5-1/2" line,
  and the right edge.
  These slight cuts make assembly much cleaner and straighter.
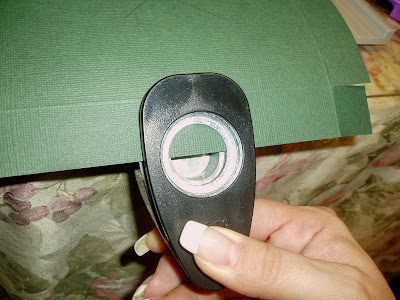
 On that same side, use your circle punch to make a half moon cut on the edge so that the box can easily open with your thumb.
 This is where you place your adhesive (on the side facing up).
  I use double sided tape. It holds very well! I cover the entire tab with tape. Cover all 6 tabs and begin to assemble your box.
  I start with the bottom of the box, making sure to line up the top edges. Make sure your tabs are stuck inside the box so they are not visible. If you put your adhesive in the right spots your tabs can only get stuck on the inside anyway. LOL Below is the top of the box. I haven't added the decorative piece yet.
 Now slide your thumb and forefinger down the box along the strip and pinch the strip where the edge of the box is, as shown below.
 This will make a nice crease right in the right spot. Now turn the box slightly so that you can crease the next edge, as shown below.
 Set this piece aside and do the same thing to the other strip of cardstock.
 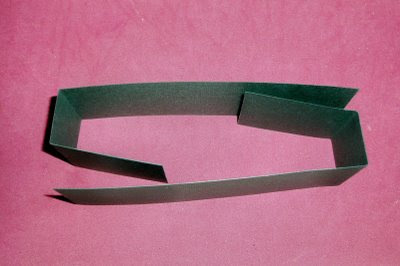 each short flap is attached to the INSIDE of each long flap. So that all you see on the outside of the box are long flaps. The short ends will be hidden. Place adhesive on the short sides as shown below.

 Hope you enjoyed this tutorial! If you have any questions, please let me know. Thanks so much for stopping by and have a wonderful night!


