Hi everyone! Hope you all had a great Tuesday! Thanks for stopping by for a visit! This year, (and I don't normally make New Year's Resolutions), I am hoping to keep up with my blog more regularly. When I first started a couple of years ago, I was doing pretty well. LOL! But of course you all know how life takes over! Unfortunately, I let it really take over! LOL! Anyway, I have a mini to share that I made several months ago for a dear friend who lost her father. I used a tutorial from Laura @ Follow the Paper Trail on her paper bag flip album.
This was a super fun mini to make. It came out rather thick as you can see! lol. It is made with a chipboard cover and spine and the closure is Grunge Paper from Tim Holtz. It is held in place by a small disk magnet from Basic Grey.
The spine is covered with brown canvas from Joann Fabrics. All of the fibers and ribbon are tied onto 2 D-rings from Tim Holtz. The charms are assembled on a Swivel Clasp, also from Tim Holtz.
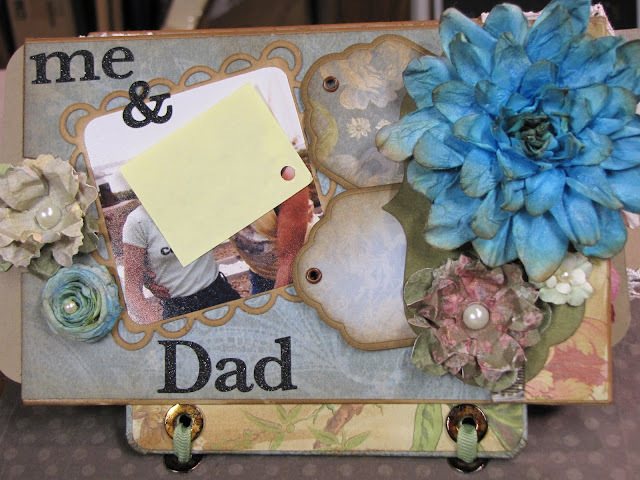
This is the first page. I have yellow sticky notes on the photos to protect identities. The reason this album is called a flip album is because you flip the direction of the opening of the bag from page to page. So the opening on the first page is to the right. The second page the opening flips to the left, and so on.
I have handmade most of the flowers in this book, except for the really small ones. In most cases, the flowers are punched from paper first and then distressed and layered together.
The phrases in the frames are ones that I printed from my computer. The dangling charm is a Tim Holtz Fragment with paper adhered to the back.
I used ribbon and silver washers from the hardware store. I distressed the washers with Tim Holtz alcohol inks to get the desired color. They came out a bronze-y, aged finish.
The side pockets are made from Tim Holtz on the edge dies. The pearls on the edge of the lace are individual pearls that I hot glued on. The tags are made with my Cricut.
The initials are from Making Memories. I printed Twinkle Toes on one of the tags because they loved to dance.
A rolled rose that I made and some Prima Bling!
Like I said, this was a super fun album to make! It wasn't super fast, but it was fun. I enjoyed every minute I spent making this very special album. Video to this album.
Thanks again for stopping by and if you have any questions, please don't hesitate to ask!
Hugs,
Rachel


