
Showing posts with label Design Team Project for Ephemera's Vintage Garden. Show all posts
Showing posts with label Design Team Project for Ephemera's Vintage Garden. Show all posts
Friday, April 17, 2015
VIDEO For My Creative Team Project Using Miss Lady Fay
Hi Everyone! Happy Friday! I just wanted to share with you the video for my Miss Lady Fay Journal that I posted yesterday. It is still available in my Etsy Shop! I hope you have an awesome weekend!


Thursday, April 16, 2015
Creative Team Project for Ephemera's Vintage Garden~Junk Journal
Happy Thursday, Everyone! Thank you so much for stopping by! Today I have a Creative Team Project for Ephemera's Vintage Garden! I am using Miss Lady Fay for the next couple of months and let me tell you, this kit is GORGEOUS; not to mention I absolutely love magnolias!
I used an old book that I picked up at a thrift store, and took all the pages out of it. I was left with just the cover. I stained it with several colors and then sealed it. The image on the front is one of the pages included in the kit. I sewed around the edges and left the threads hanging off to give it that shabby look. I added a seam binding bow and a flower charm to the spine as well as a seam binding closure. All of the seam binding I hand dyed.


 All of the pages have been hand-dyed as well. There is stitching throughout, with many decorative elements such as lace, and trim.


 This journal comes with 8 hand dyed tags; 4 of them are stamped, and the other 4 are left blank so that you many decorate them any way you wish.

I used an old book that I picked up at a thrift store, and took all the pages out of it. I was left with just the cover. I stained it with several colors and then sealed it. The image on the front is one of the pages included in the kit. I sewed around the edges and left the threads hanging off to give it that shabby look. I added a seam binding bow and a flower charm to the spine as well as a seam binding closure. All of the seam binding I hand dyed.
It measures 6-1/4 x 9-1/2 inches and the spine is 1 inch. It has 3 sewn-in signatures. There are 78 pages, counting front and back, 23 pockets, 21 tuck spots, and 1 envelope on the inside back cover.
Again, thank you so very much for visiting me today! I really appreciate it! Have a wonderful day!
Rachel
Sunday, April 5, 2015
It's Sneaky Peeky Time!
Happy Easter Everyone! Thank you for stopping by! Just a quick share tonight. I have a sneak peek of a new journal I am working on. The cover is made from a hanging file folder. The spine has been reinforced with brown duct tape and it has 3 sewn in signatures. I am using Mushrooms and Birds ATC - Enchanted Forest set from Ephemera's Vintage Garden. It is a gorgeous set!

I hope you had a Blessed Easter with your families and I'll see you really soon with the rest of this journal! Thanks again for stopping by!
Rachel
I hope you had a Blessed Easter with your families and I'll see you really soon with the rest of this journal! Thanks again for stopping by!
Rachel
Sunday, November 10, 2013
Two new videos for my December Daily 2013!
Hey again! I have two new videos showing my December Daily Process that I wanted to share with you. :) Thank you for stopping by today! Have a fabulous holiday weekend! Thank a Veteran tomorrow if you can!
Monday, November 4, 2013
December Daily 2013 using Ephemera's Vintage Garden~Videos!
Heeeyyyyyy everyone! So happy you stopped by today! I have been a busy bee working on my December Daily (base pages) and recording process videos for you! I made my covers from a pasta box that had a cute window cut out in the front. I love the fact that I will be able to see the first page of my DD. I am using the DCWV Heirloom Christmas Stack and the Days of December printable journal kit from Ephemera's Vintage Garden. This kit comes with so much and is only $8.95!! So here are just a few pictures of what I've done so far, but if you want to see what I've done in it's entirety, go check out my two videos. I will provide them at the bottom of this post.

 In the photo above, I am using shipping tags from Staples, old book pages that I tore out of an old book, kraft cardstock from Joann Fabrics, a doily and bakers twine.
 In the photo above, I am using a kraft envelope from Michaels, a doily and a journal spot from the Days of December Journal Kit.
 In the photo above, I love the addition of paint samples!! Go to your local Lowes, or Home Depot, or wherever they sell paint, and pick up a few! The tag and library pocket are from the Days of December Kit, and I added some washi tape from my stash.

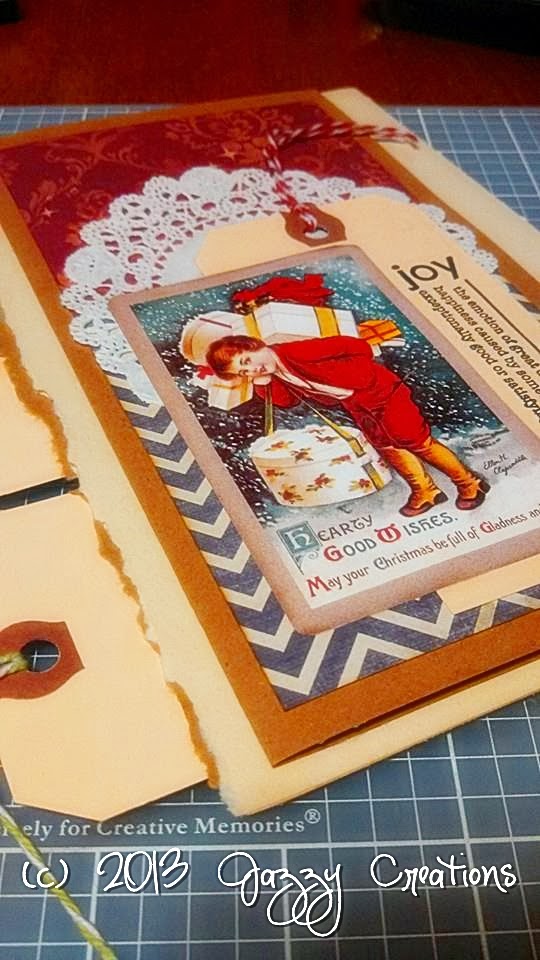


Thanks for stopping by!! Here are my videos, there are two so far!
Wednesday, October 30, 2013
December Daily 2013 using Ephemera's Vintage Garden
Hi Everyone! Can you believe we are talking about December Dailies already?? Where did this year go?? Time just flies, doesn't it? So I am gathering my supplies for my December Daily and posted a video today of the fabulous kit I will be using from Ephemera's Vintage Garden! It's called Days of December Printable Journal Kit, and it's ONLY $8.95!! I will also be using the Days of December Planner Kit which is ONLY $5.95.

I will be doing a process video showing how I will put together my DD. I am not sure if it will just be 1 video or a couple. The video I posted today shows the supplies I will use. If you'd like to make one right along with me, that would be great! If you'd like to use the same kits, go visit Debbie and download your copy! You won't be disappointed. She also has another new kit called Christmas Whimsy. This kit includes pink and teal in the design. Here is the Planner Kit for Christmas Whimsy. Both designs are awesome though so you can't go wrong.
Thank you for visiting me today. Here is the video I posted on you tube. Enjoy the rest of your week!
Saturday, August 31, 2013
Video for Ephemera's Vintage Garden Journal!
Hi Everyone! Thanks for visiting me today! I hope you are all having a wonderful weekend so far! I have uploaded my video for my recent journal! I hope you can check it out!! Quick post today as I am working on more projects! Happy crafting!
Thursday, July 11, 2013
Design Team Project for Ephemera's Vintage Garden-Number 2
Hi Everyone! I hope you are having an amazing day wherever you are! The sun is finally shining and it's gorgeous out. Today I have my second project for Ephemera's Vintage Garden. This was so incredibly fun to make and surprisingly, didn't take me that long. I am using Coral Blues. The set is called Scrapbook and Journal Card Set. If you click here, you can check out the designs. It is an add on to the Coral Blues Journal Kit. As you can see, you can use this set for more than just paper crafts!


I used Tim Holtz Fragments and adhered the design paper to one side with Judikins Diamond Glaze. You could use Glossy Accents as well, I just didn't have any in front of me at the time.
 For this one below, I adhered the punched butterfly to the back first, and then I adhered it to the polka dot paper.

 For this one below, I adhered the punched butterfly to the back first, and then I adhered it to the polka dot paper.

Once they were completely dried, I cut them out using scissors, and then I sanded the edges a little to clean it up.


Then I used Tim Holtz Distress Ink in Walnut Stain to ink around the edges of the paper to eliminate the white core showing. Then I adhered more designer paper and Tim Holtz word stickers to each charm. Again, I went around each one with Walnut Stain. Once I was done with that, I put a layer of Diamond Glaze on top and let them dry for a few hours.


Here is the completed bracelet.


And here's the other side with the words...


I hope you enjoyed my project today and I hope that it inspired you to think outside the box! Thank you so much for stopping by! Have an amazing day!
Here is the video!
Here is the video!
Friday, July 5, 2013
Design Team Project for Ephemera's Vintage Garden
Hi Everyone! Thanks for stopping by today! I have my first project for my Guest Designer spot for Ephemera's Vintage Garden! Yayyy! I was so excited to work with this fabulous journal card kit. It is called Coral Blues Scrap Journaling Card Set. It is absolutely gorgeous! For this first project I had the digital papers printed at Staples on Matte Photo Paper. The print quality is fabulous! I wanted to show the versatility of this set because it can be used for far more than just Project Life journaling cards. This month I will show you the many ways this set can be used!


I decided I was going to make a set of Thank You note cards.
First, I cut apart the six 3x4" journal cards, and the accessories. Then I inked all the edges with Tim Holtz Distress Ink, Walnut Stain.
 Next, I used my Tim Holtz Alterations Die, Tattered Florals to cut flowers from the design paper. I knew I wasn't going to use these tabs for this first project so I used those! I placed the tab over the smallest flower in the die, and ran it through my Cuttlebug.


In the photo above, you can see all my flower shapes. I used other small journaling cards from the set to cut the larger flowers. Next, I used my stylus to curl up the edges of each flower.
In the picture below, you see my six "thank you's." I used a stamp from Savvy Stamps. I stamped it using Adirondack brown ink. I inked the edges with Walnut Stain Distress Ink. I then cut them out with scissors.
 Once I had all my pieces cut and inked, I began to assemble my cards. I used Stampin Up card stock in Soft Suede as my card bases. The finished card is 3.25 x 4.25". I used Recollections Signature paper flowers, my Martha Stewart triple Butterfly Punch, an EK Success Butterfly Punch, and a pearl bead for the flower center. I cut a fish tail in one of the strips of designer paper and adhered the sentiment to it.
 This is the inside of the card. The designer paper is SO easy to use! They are gorgeous! You don't have to do anything else.


For my next card, all I did was use pieces from the accessories sheet, like the button and fish tail cut paper. I added embroidery floss to the button, which I punched out using my EK Success 1" Circle Punch. A super simple card to make but really sweet!


For my next card, it was just all about layers. I used one of the 3x4" journal cards as the first layer, then the polka dot strip, which I simply cut from the accessory sheet. I used the argyle fish tail cut paper, and the diamond fish tail cut paper from the accessory sheet. The flowers are cut from other journal cards, and I added a pearl bead to the center.
 This is the inside of that card.

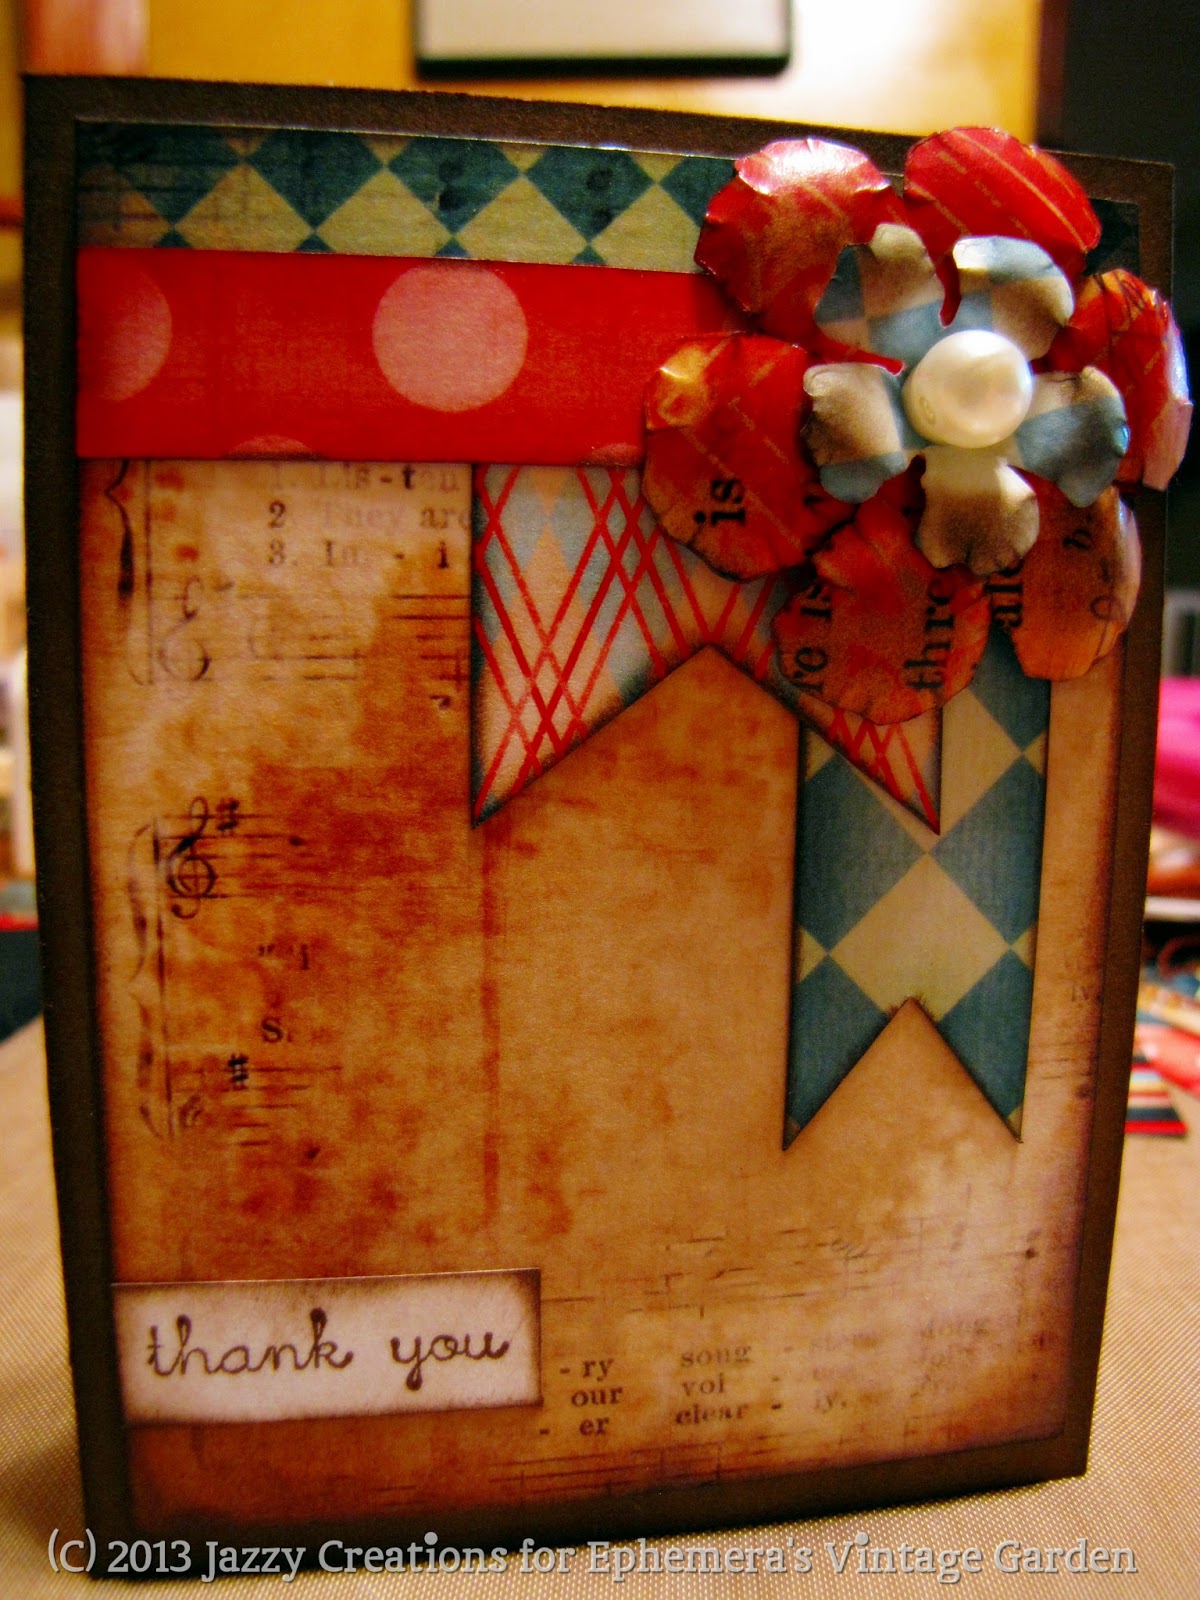

For my next card, I added embroidery floss to the top of the journaling card before adhering it to the card base. I tied the sentiment to the floss before adding the butterfly on top. The flowers again are cut from extra journal cards with the pearl bead.
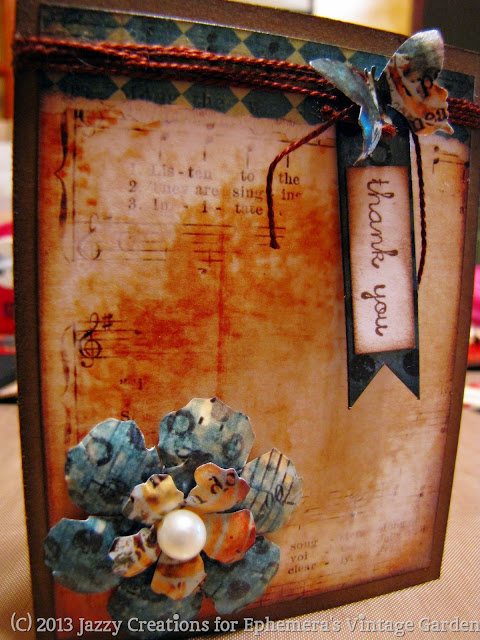

For my next card, I chose to go really simple but with this paper, it looks like I put a ton of work into it! I used a Recollections flower with a flower I cut from the paper, embroidery floss, a pearl bead, and the fish tail banner hanging from the floss.


And for my last card, I used a 4" doily that I distress with walnut stain, two Recollections Flowers, and a butterfly cut from the designer paper. Isn't it sweet? :)
 Here are the cards together.... I had such a ball making these cards today! I hope you enjoyed seeing them come together and I hope you'll stop by Ephemera's Vintage Garden to pick up your set! :) I will be doing a video on these cards as soon as I get my voice back! I have a cold that has taken it away for the time being! LOL!

What's my next project? You'll have to come back to see! Thanks for stopping by today!!


Subscribe to:
Posts (Atom)