Tuesday, January 17, 2012

Christmas Mini/Planner with Beaded Binding


Hi everyone; happy Tuesday to you all!  I hope you all had a fabulous weekend with your extra day off!  It was a very mellow weekend for us; lots of football and lounging! :)


Here is my Christmas Planner/Organizer that I made.  You will see lots of Christmas projects for a little bit because I haven't posted much.  But the way I figure it, it's hard for me to make a mini album without pictures and so I don't usually have an easy time making a mini well before Christmas.  This album doesn't have pictures in it yet but I do have them printed and ready to add.  The only thing that isn't complete in the pictures is the beaded binding.  I have it halfway done in these pictures because it's easier for you to see what's going on. 


This album is very thick and I have hinges between every page so that each page moves freely.  Because it is so thick, covering the binding was a little challenging so I settled on stringing beads all the way across to hide the hinges.  
There is no rhyme or reason to the order of the beads.  I just strung on beads that matched the paper collections I used.  There are so many colors on the papers that pretty much anything goes!  lol.
Inside, are sections that are labeled.  I used my Just Rite stampers alphabet stamps (the itty bitty ones that require tweezers) to stamp each divider tab.  
The pages are either white cardstock, coin envelopes, page protectors, or patterned cardstock.  The coin envelopes all have magnets or velcro to keep them shut. 
Thanks for stopping by today!  If you have any questions about this project, let me know. I would be happy to try and explain anything in further detail or take more photos.  I may do a video of this book to explain how I constructed it.  In the meantime, please leave a comment!  Thanks!  ;-)  Hugs!


Monday, January 16, 2012

Cleaning my craft room

Happy Monday and (MLK) day!  My day has consisted of painting my nails. lol :)  I contacted Bona @ LiveLoveScrap last week about a color I saw on her nails in one of her YT videos.  For those of you who love glittery nails and love pink, this is the combo for you!  I used one coat (just on the tips of my nails) NYC 242B Uptown and then 1-2 coats of Wet n' Wild Shine 435G on top of that.  Bona used Sally Hansen Xtreme Wear 200 Strobe Light, which is also a gorgeous color!!  I also purchased the Wet n' Wild color and used that one instead (I bought 8 different polishes yesterday! lol) So anyway, I love them!!  :)


The other thing that I am seriously considering doing is cleaning out my craft room.  Out with the old and in with the new right?  I have been collecting scrapbook and stamp supplies since 2001.  We are talking years of shopping!  But to fully grasp the impact of my shopping experience (and addiction), I have to break it down even further and think..... I am looking at months,.... and months,.... and months, (say it with me really slowly for full appreciation), and months.... of shopping!!  The amount of projects I have made doesn't even come close to the amount of items I have purchased over the last 12 years!  ROFL!! Sooo....what do I do with it all?  Do I sell it?  Do I give it away?  Do I donate it?  Whichever the case, to whom??  This is hundreds (I don't have the guts to say thousands) of dollars worth of stuff.  I could make my room look so nice if I didn't have so much STUFF in it!  LOL!!  Sooo, anyone have advice?  Anyone want to see what I have?  I am open to anything at this point.  It's a new year, it's a fresh start, and one way to start over is to remove the items that I will never use and see them go someplace where I know they will be enjoyed.  So much of these things are still in packaging because I've never used them!  So sad and pathetic, isn't it? ;-)  Anyway, leave me a note and give me your thoughts; I would really appreciate it and would be overjoyed!  Thanks for stopping by and saying hi!  ;-)  HUGS!

Sunday, January 15, 2012

I've joined Pinterest!

Happy Sunday everyone! Had a pretty mellow day except for venturing out into the bitter cold to go grocery shopping.  I also paid a little visit to Jo-Ann's for some organza, satin, ribbon and thread!  


Guess what I did last night in the wee hours of the night?!?....I joined Pinterest!  Yep, another addiction to feed! LOL!  So far, I love it!!  There are so many cool things, I am re-pinning like every 30 seconds! lol!  I tried to add my button to the sidebar on the left but blogger is not behaving tonight.  I have been trying to do this post for over an hour.  


I also made a couple of satin rolled roses last night but they aren't my favorite.... :( .... kind of disappointed with how they turned out.  I haven't taken pictures of them yet because they are so darn ugly!  LOL!!  Just kidding.  I will take photos tomorrow when I have some daylight.  I also have some stick pins to share with you tomorrow!  


Got my favorite shows on tonight; can't wait!  Desperate Housewives and Pan Am!!  Hope you all had a wonderful Sunday!  Talk to you tomorrow, lots of hugs....

Saturday, January 14, 2012

Favorite Tools

Good Saturday afternoon to you!!  I wanted to share some of my favorite tools today! First, is the QuicKutz Quick Stik.  Love this thing having long nails! lol 
QuicKutz IND-QUICKSTIK Individual QuickStik Pen
http://www.amazon.com/QuicKutz-IND-QUICKSTIK-Individual-QuickStik-Pen/dp/B001BQ2HJO/ref=sr_1_1?s=arts-crafts&ie=UTF8&qid=1326573041&sr=1-1


Janome Sew Mini Sewing Machine.  So cute and portable!  Great for beginners!  http://www.amazon.com/Janome-Sew-Mini-Sewing-Machine/dp/B005TL10AY/ref=sr_1_1?s=arts-crafts&ie=UTF8&qid=1326573328&sr=1-1


The Cinch Version 2!!  Love this thing!!!  Love that I can do larger books!  I have the Bind it All too but I don't like it as much; I always mess up the holes!

Cinch Book Bindery Tool V2

Love the larger surface space on this trimmer!! 

Fiskars 12-Inch Surecut Deluxe Paper Trimmer


Favorite Scoring Board!!!
Scoring Score Board and Envelope Tool Martha Stewart Crafts EK Success
http://www.amazon.com/Scoring-Envelope-Martha-Stewart-Crafts/dp/B0036FDKZS/ref=sr_1_1?s=arts-
crafts&ie=UTF8&qid=1326574556&sr=1-1

Fiskars Compact Stamp Press.  Best stamp positioner!!!
Fiskars Compact Stamp Press with Hello Friend Clear Stamp Sheet
http://www.amazon.com/Fiskars-Compact-Stamp-Press-Friend/dp/B005QSGH8A/ref=sr_1_8?s=arts-crafts&ie=UTF8&qid=1326575840&sr=1-8

Fiskars Rotary Cutter.  Perfect for cutting chipboard, or when you want to save your trimmer!!
Fiskars 45mm Contour Rotary Cutter
http://www.amazon.com/Fiskars-45mm-Contour-Rotary-Cutter/dp/B000B7M8WU/ref=sr_1_1?s=arts-crafts&ie=UTF8&qid=1326575960&sr=1-1

Perfect Layers.  Love this for getting perfect mats!!
PERFECT LAYERS Set of 2 (Tools #1 & #2) - Perfect Paper Crafting
http://www.amazon.com/PERFECT-LAYERS-Set-Tools-Crafting/dp/B005GGTMHK/ref=sr_1_3?s=arts-crafts&ie=UTF8&qid=1326576111&sr=1-3

Ok, is that enough for today?!  LOL!  All of these things I keep readily available.  Just some of my favorite things!  Thanks for stopping by and visiting me!  :)  Hugs, Rachel.

Wednesday, January 11, 2012

Paper Bag Flip Album


Hi everyone!  Hope you all had a great Tuesday!  Thanks for stopping by for a visit!  This year, (and I don't normally make New Year's Resolutions), I am hoping to keep up with my blog more regularly.  When I first started a couple of years ago, I was doing pretty well.  LOL!  But of course you all know how life takes over!  Unfortunately, I let it really take over!  LOL!  Anyway, I have a mini to share that I made several months ago for a dear friend who lost her father.  I used a tutorial from Laura @ Follow the Paper Trail on her paper bag flip album.  
This was a super fun mini to make.  It came out rather thick as you can see!  lol.  It is made with a chipboard cover and spine and the closure is Grunge Paper from Tim Holtz.  It is held in place by a small disk magnet from Basic Grey.  
The spine is covered with brown canvas from Joann Fabrics. All of the fibers and ribbon are tied onto 2 D-rings from Tim Holtz.  The charms are assembled on a Swivel Clasp, also from Tim Holtz.  

This is the first page.  I have yellow sticky notes on the photos to protect identities.  The reason this album is called a flip album is because you flip the direction of the opening of the bag from page to page.  So the opening on the first page is to the right.  The second page the opening flips to the left, and so on.  
I have handmade most of the flowers in this book, except for the really small ones.  In most cases, the flowers are punched from paper first and then distressed and layered together. 
The phrases in the frames are ones that I printed from my computer.  The dangling charm is a Tim Holtz Fragment with paper adhered to the back.  
I used ribbon and silver washers from the hardware store.  I distressed the washers with Tim Holtz alcohol inks to get the desired color.  They came out a bronze-y, aged finish.  
The side pockets are made from Tim Holtz on the edge dies.  The pearls on the edge of the lace are individual pearls that I hot glued on.  The tags are made with my Cricut.


The initials are from Making Memories.  I printed Twinkle Toes on one of the tags because they loved to dance.


A rolled rose that I made and some Prima Bling!


Like I said, this was a super fun album to make!  It wasn't super fast, but it was fun.  I enjoyed every minute I spent making this very special album.  Video to this album.

Thanks again for stopping by and if you have any questions, please don't hesitate to ask!  

Hugs,
Rachel


Saturday, January 7, 2012

Shopping Organizer


Hi all!  Wanted to share this shopping organizer I made for 2011's Christmas Season.  Laura at Follow the Paper Trail has a wonderful you tube video showing how to make one.  Super easy instructions and very quick to make!  I added a pad of paper that I made (not shown) to the right side of the organizer under the word Lists.  I will take a picture of that and share that as well.  I didn't use a post it note paper pad as Laura had done.  This was AWESOME to carry around with me as I was shopping!!  It kept me very organized and kept everything in one place.  No more separate notes on different pieces of paper all over my purse!  All of my gift recipients had a separate sheet on my pad of paper and I check marked each item from their wish list as I purchased them.  This made sure that I bought the same amount of gifts for each child, which is very important in our house!!  LOL!!  I kept all the receipts in the pockets as well.  I tied a jingle bell on a string and wrapped it around the snowflake on the front cover so that I could hear if "someone" was being snoopy!!  :)  Anyway, this is going to be a tradition from now on; to make one of these every Christmas or simply re-use this one every year!  Thanks for visiting me and please ask if you have any questions.... hugs!

Friday, December 9, 2011

Christmas Goodies!

Hey Everybody!!  I can't believe I made it back to my blog!  It had been so long since I had logged on that I couldn't find it!  But TaDa!!  I found it. lol.  
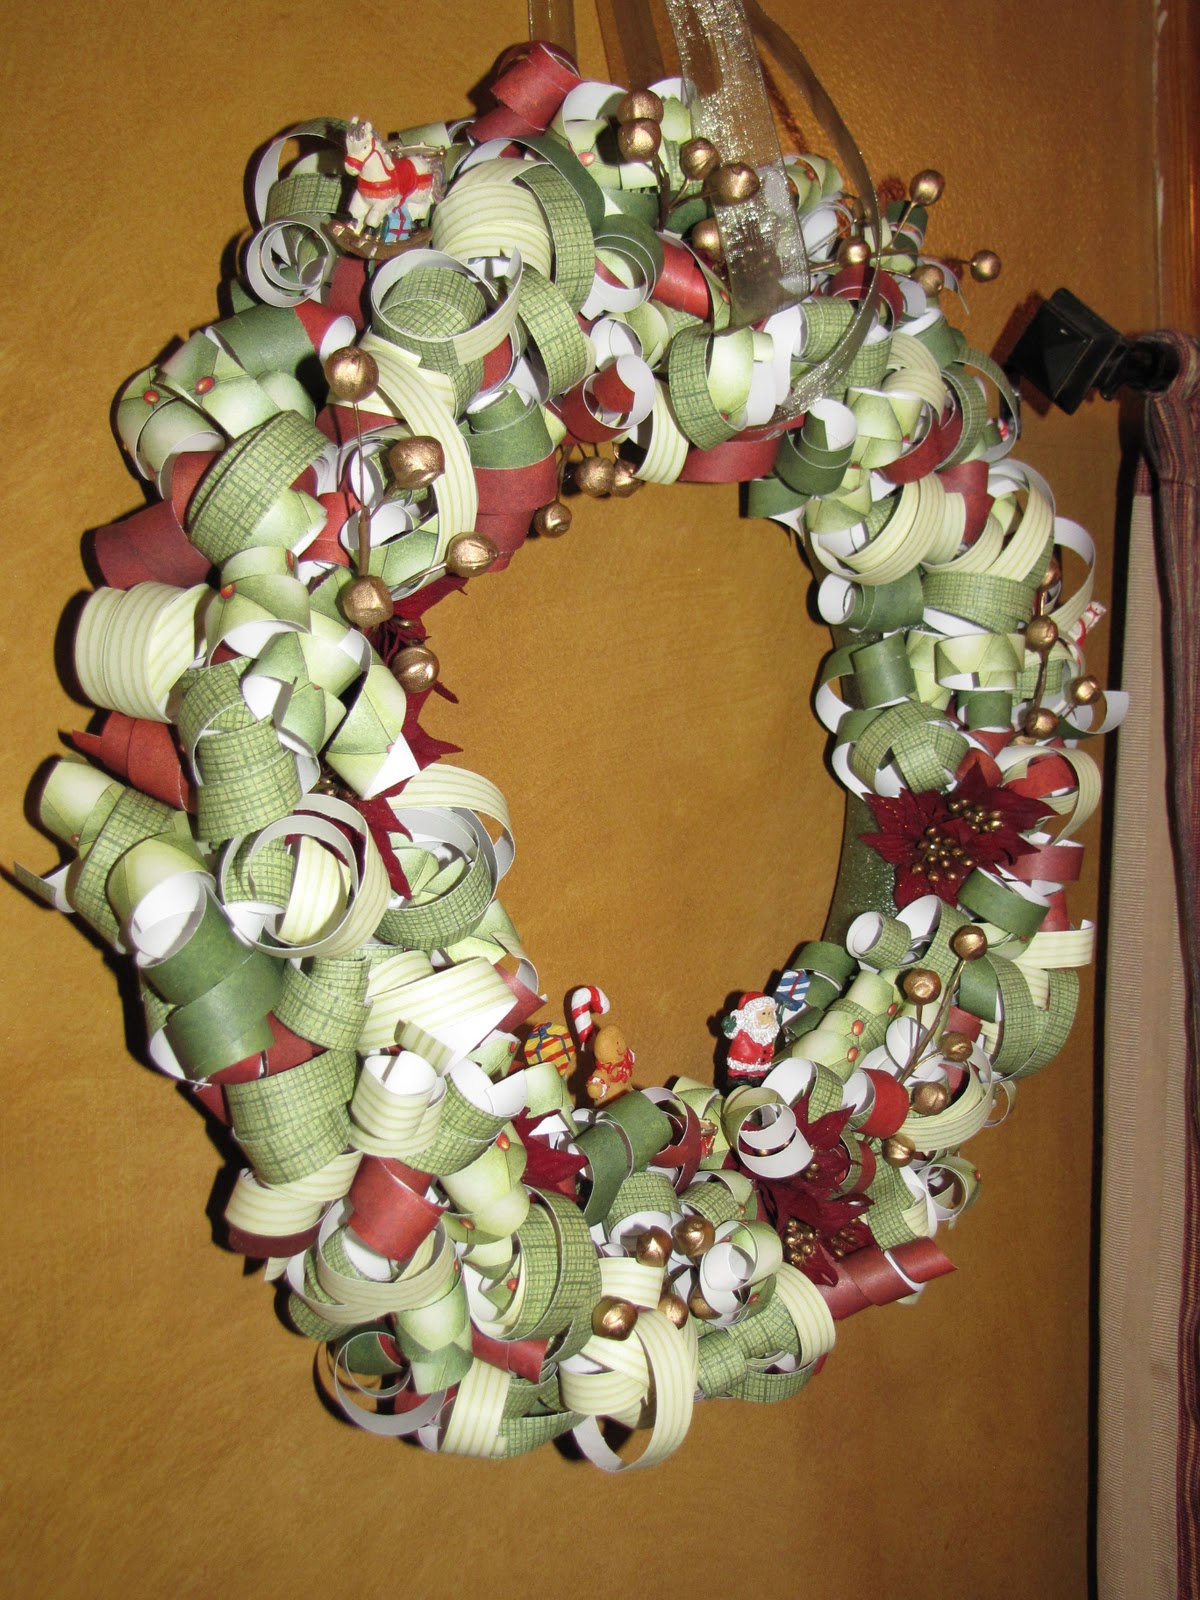
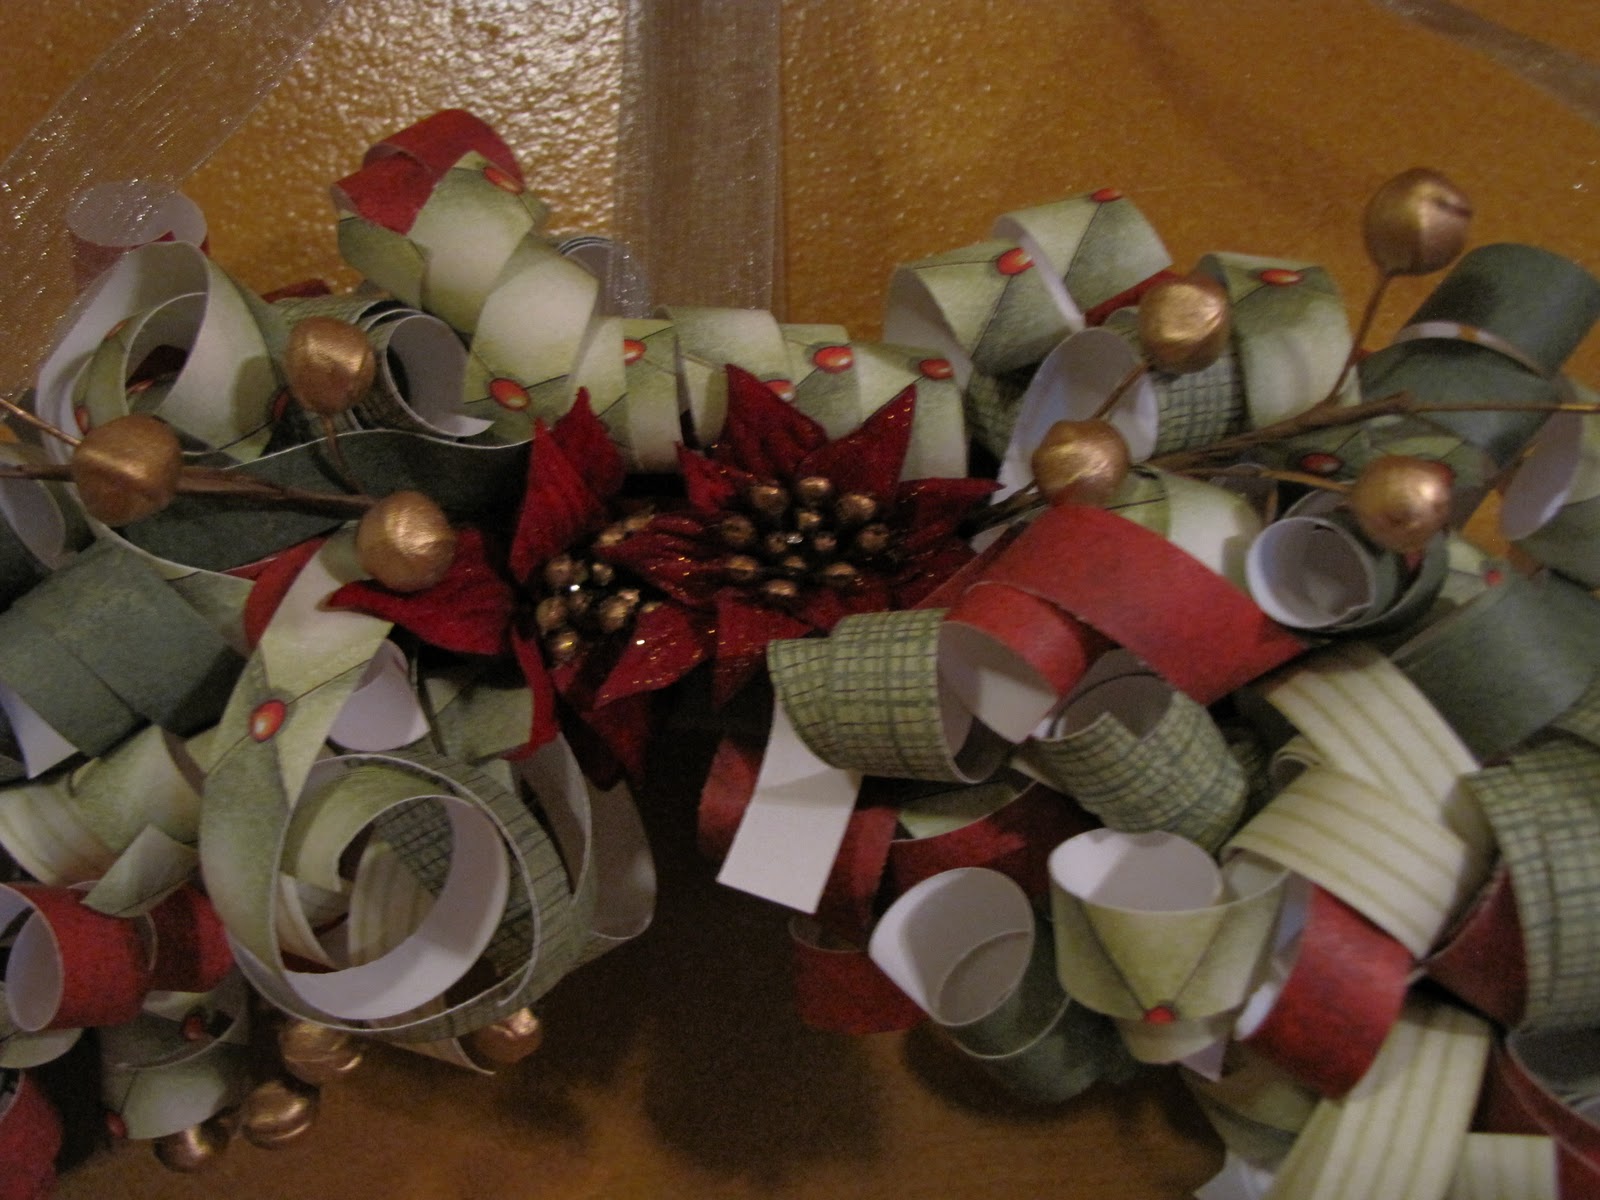
I can't believe the Christmas Season is here again already!  I have been hard at work finishing up some projects! Today I have a curly paper wreathe that Shellyb140 (on youtube) showed how to make.  Hers are so stinking cute I had to try on. I will probably make a few more! But here is mine. I used some old Stampin Up paper that came in a scrapbook kit.  I also used some odds and ends that I had stashed away in my Christmas decorations.They are so easy to make and they don't take long at all. This was done in one evening. You just cut 1/2" strips from 12x12" patterned paper, curl them like you would curling ribbon and use stick pins with the tiny heads on them to poke through the paper and into the hard green styrofoam wreath.  Not the white wreathes that crumble when you touch them, but you want to use the green hard ones (in the same aisle at the craft store). Really there is no rhyme or reason to this, I just poke away! And I love how it turned out. I have it hanging to the left of my dining room window. I have to make another for the right side lol!!  Anyway thanks for stopping by. If you have any questions, please ask away!!  Take care!!! Hugs, Rachel


Tuesday, February 15, 2011

Hello Friend...

Wow! I can't believe how long it's been since I have posted!!  I tried to post yesterday and for some reason I couldn't log on and see my dashboard!  So I posted pics to my facebook page instead.  I thought that my blog was deactivated or something!  Anyway, I have several cards to share but I am only going to post one a day so it looks like I make cards everyday!  LOL  But in all actuality, I made them all in one weekend!  ;)  I have been watching and following Kristina Werner's blog forever now and she has been the inspiration for all of my cards lately.  I love her designs; the simplicity of them and how easy it is to finish a card!  Here is the design I fell in love with.  The cardstock is from Stampin' Up, as well as the ribbon.  I also used Versamark ink and Martha Stewart Crafts embossing powder.  The scallops are made from 3/4" circles.  The corner rounder I used is the Corner Chomper from We R Memory Keepers.  Thanks for stopping by; I know it's been awhile!  :)